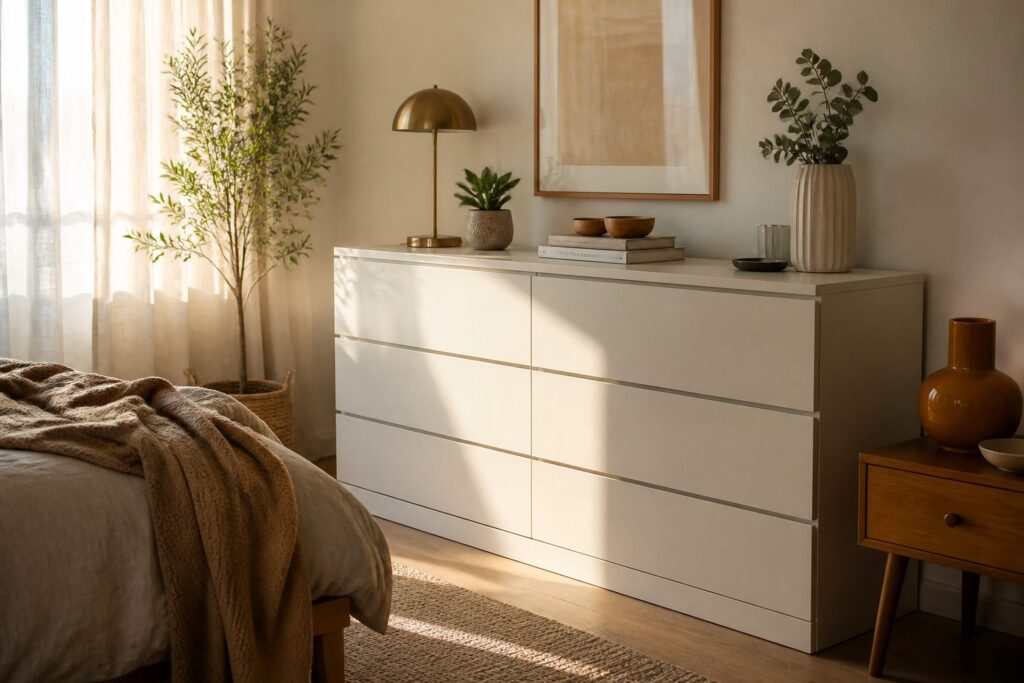
IKEA dresser hacks for the bedroom run from a $35 Rast repaint to a triple-Tarva wall unit that needs a full weekend.
The deciding factor is how much of the original surface you are willing to strip or cover, because some frames take stain and others fight it.
The TARVA’s unfinished pine stains evenly; the MALM’s laminate demands shellac primer first or the paint peels within a week.
1. Bone Inlay Stenciled Hemnes
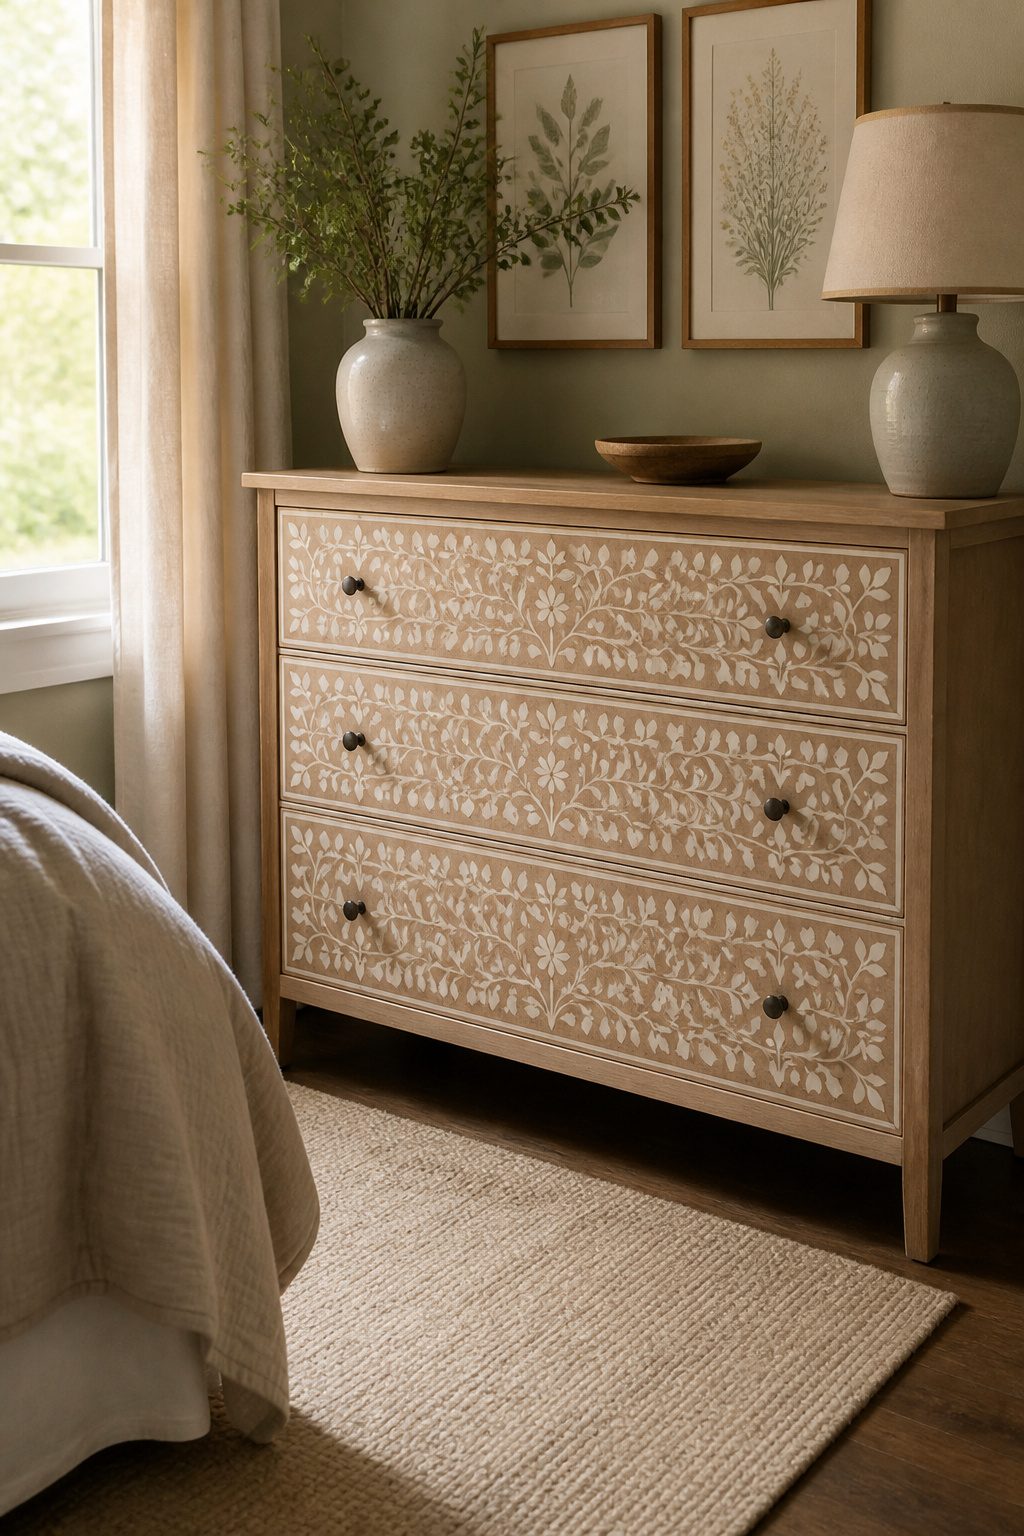
The bone inlay look on a Hemnes dresser starts with a stencil and two paint colors that read as real bone against the wood.
I would pick a warm off-white, something with a touch of yellow rather than gray, and a slightly darker cream for the shadow lines.
The contrast against the natural wood tone of the Hemnes is what sells the illusion, so the paint needs to sit close to the wood without matching it.
Painter’s tape can substitute for a stencil if the pattern is geometric, though a purchased stencil saves time on curves.
The technique is the same either way: base coat first, then stencil the pattern with the darker shade, let it set, and touch any bleed with a small brush.
Two light coats beat one heavy coat; thick paint wedges under the stencil edge and ruins the crisp line.
For bedroom use, the finish needs a clear sealer over the paint. Polyurethane in satin holds up to daily drawer pulls without looking plasticky.
I would skip high-gloss; it reads as craft project, not furniture. One coat of sealer is enough if the dresser sees normal use, two if it sits in a high-traffic spot.
2. West Elm Inspired Design
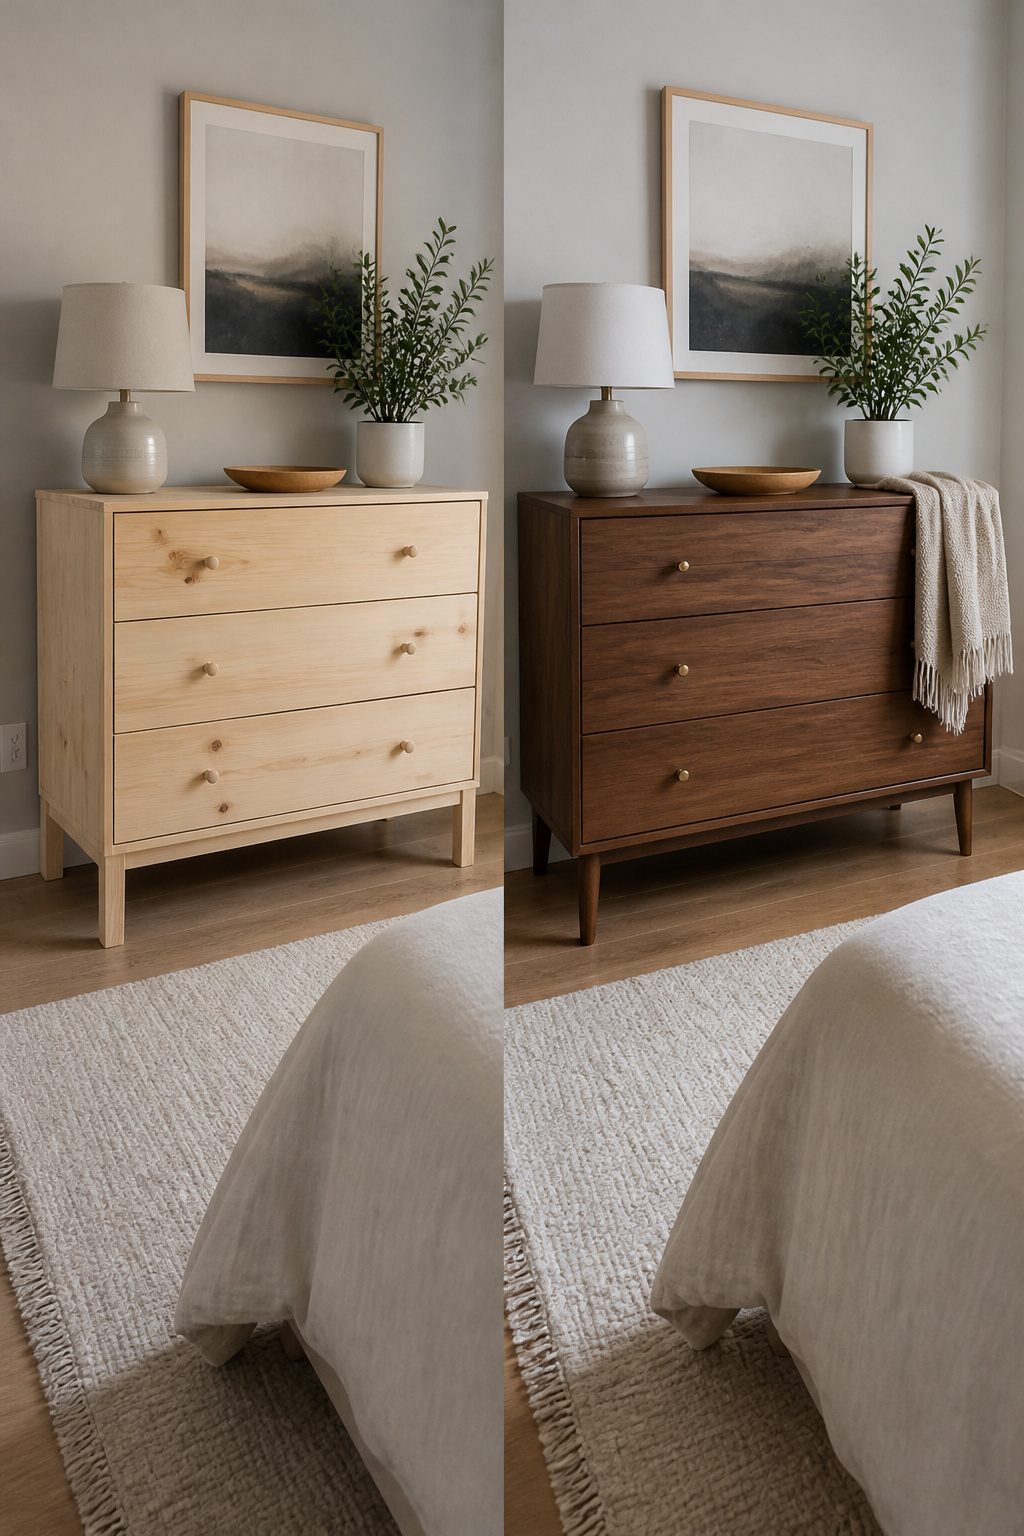
Walnut veneer or contact paper laid over an IKEA dresser frame gets you most of the way to the West Elm look for a fraction of the cost.
The real shift happens when you swap the stock legs for tapered ones and replace the hardware with pulls that echo their mid-century brass or aged bronze shapes.
A TARVA dresser takes this especially well, its unfinished pine giving you a clean substrate for stain or adhesive veneer.
I would skip trying to match West Elm’s exact walnut tone, their finishes vary by collection anyway, and instead aim for a warm medium brown that reads expensive from across the room.
The hardware is where I would spend the money, cheap pulls read cheap even on a good surface, but the legs can be secondhand or from a furniture parts site without losing the effect.
Glue and scissors get the veneer down, a screwdriver or drill handles the rest, and the whole project fits a single afternoon.
Inside the drawers, veneer edges there need trimming flush or they catch on linens. Leave the interior bare and no one sees it; line it and the edge disappears anyway.
3. Overlay Drawer Panels
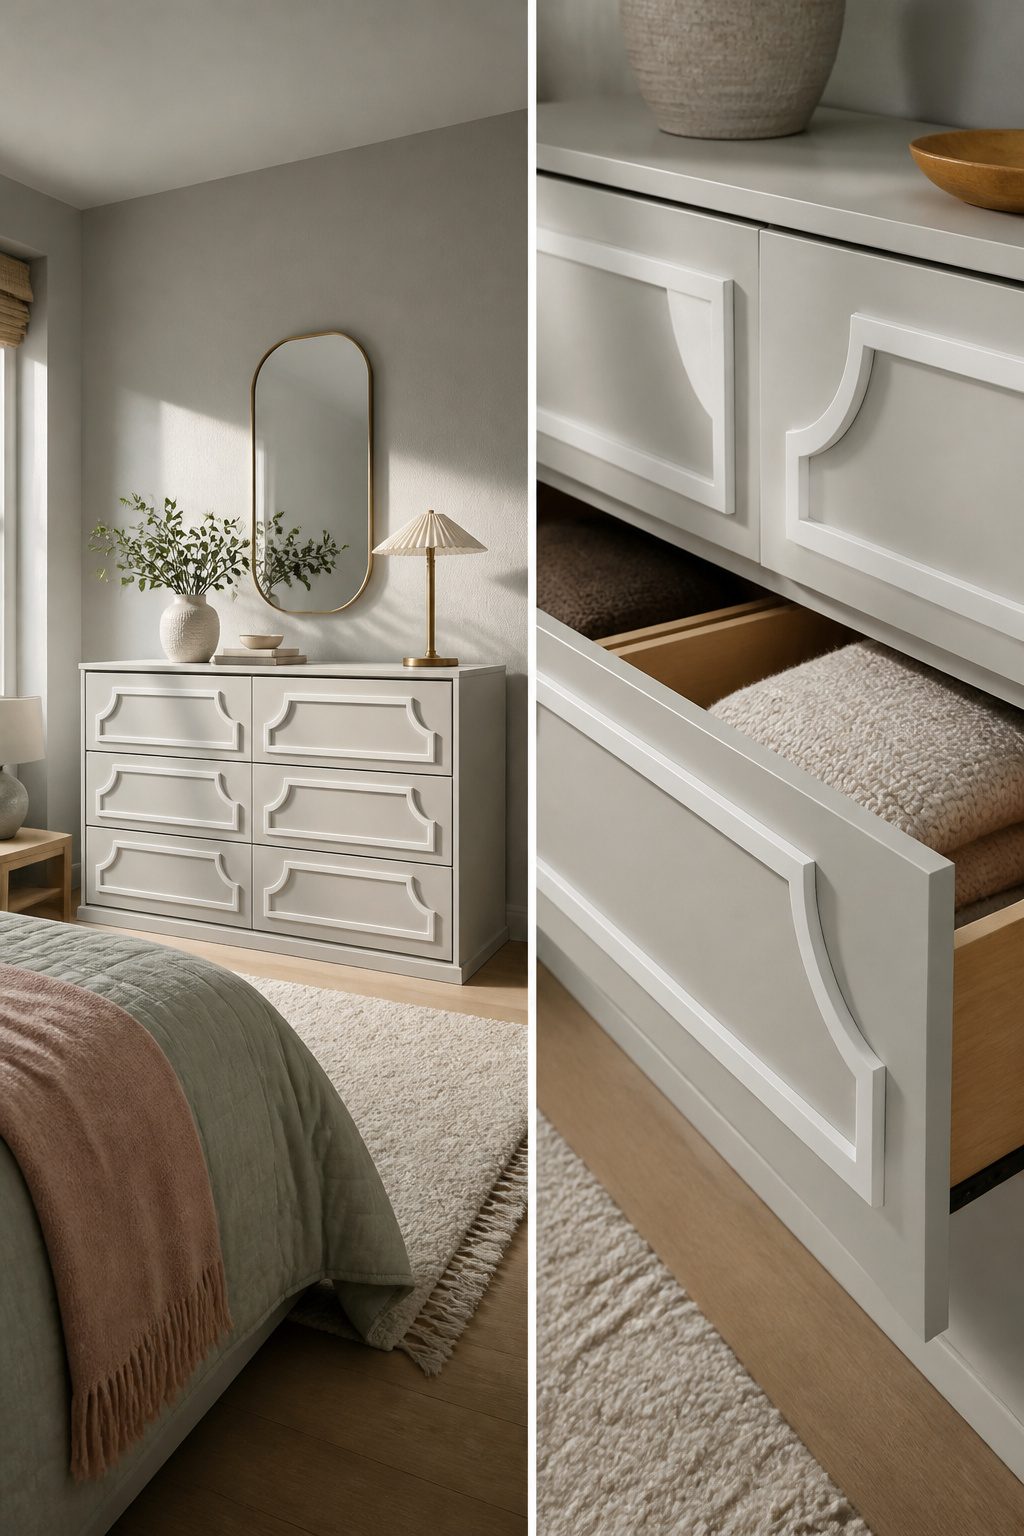
Flat drawer fronts on the MALM or HEMNES read as blank walls, which is exactly why overlays work so well. Decorative overlays, sometimes called appliques or onlays, add molding profiles that read as built-in architecture without replacing the drawer itself.
I would skip the resin versions that feel plasticky and go with wood composite or thin MDF pieces from hardware stores or online trim suppliers; they take paint cleanly and hold crisp edges.
Attachment is the part that trips people up. Drilling through the drawer face risks blowout on the inside and can interfere with the drawer box behind it.
I would use a construction adhesive rated for wood and laminate, applied in thin beads to the back of the overlay, then clamp it with painter’s tape while it sets.
Small brad nails from a pin nailer work too, but only if you are willing to fill the holes; for renters or anyone who might reverse the hack later, adhesive alone is the cleaner play.
Thickness matters more than most first-timers expect. Standard pulls and knobs need at least 3/4 inch of clearance between the overlay surface and the center of the mounting hole, or the hardware will not seat flush.
Many overlays run 1/4 to 3/8 inch thick, which leaves plenty of room, but scrollwork with deep relief or layered designs can eat into that margin.
I would hold the overlay and pull together in the store before committing, or order samples if buying online.
4. The Legs Say It All
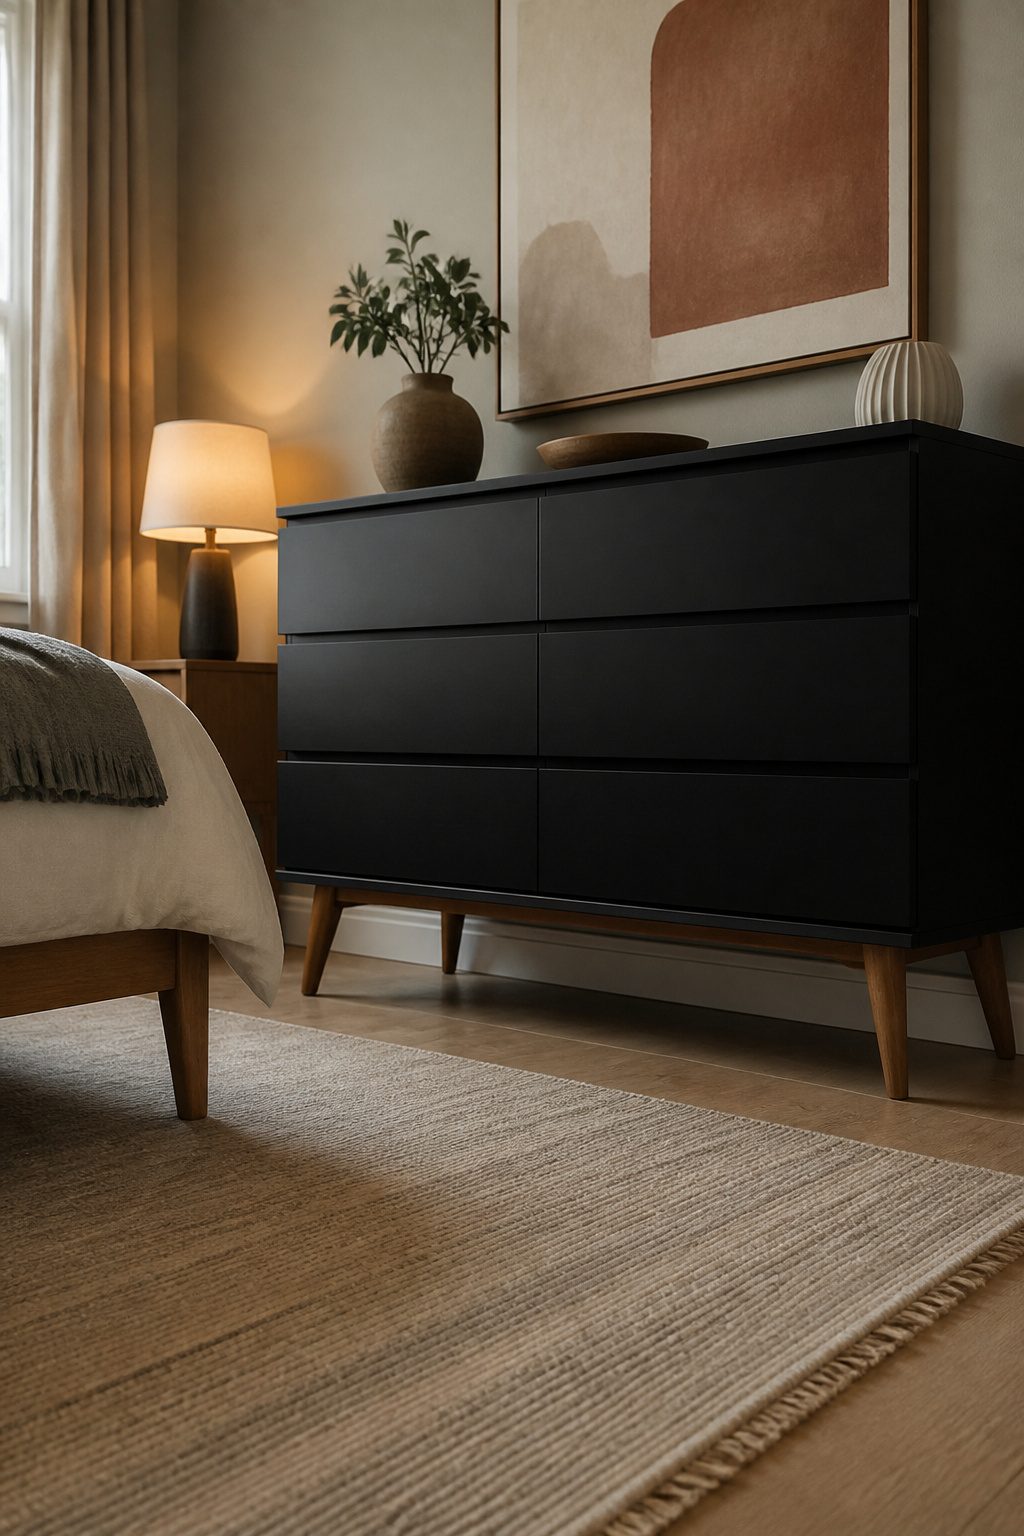
MALM dressers sit flat on the floor, which is exactly why adding legs changes the whole room. A 2–4 inch lift pulls the proportions away from blocky and toward furniture that looks intentional.
I would skip anything taller than 4 inches; beyond that, the dresser starts to read as a console table with drawers, and the storage height gets awkward for daily use.
The legs themselves are easy to source. PrettyPegs, Amazon, and most hardware stores carry mid-century and tapered options in wood or metal, usually running $20–$40 for a set of four.
What matters more is the mount. MALM frames are hollow, so a standard wood screw will tear right through the thin bottom panel.
I would use a T-nut and bolt system, or a furniture leg plate with multiple screws spread across the frame’s internal bracing, not the skin alone.
Some makers add a ¾ inch plywood sub-base inside the frame to give the hardware something real to bite into, which I think is worth the extra half hour.
The finished look leans modern or Scandinavian depending on leg choice.
Tapered walnut reads mid-century; straight brass pulls toward something cooler and more current. Paint and hardware can follow, but the legs set the direction.
5. Grasscloth-Covered Besta
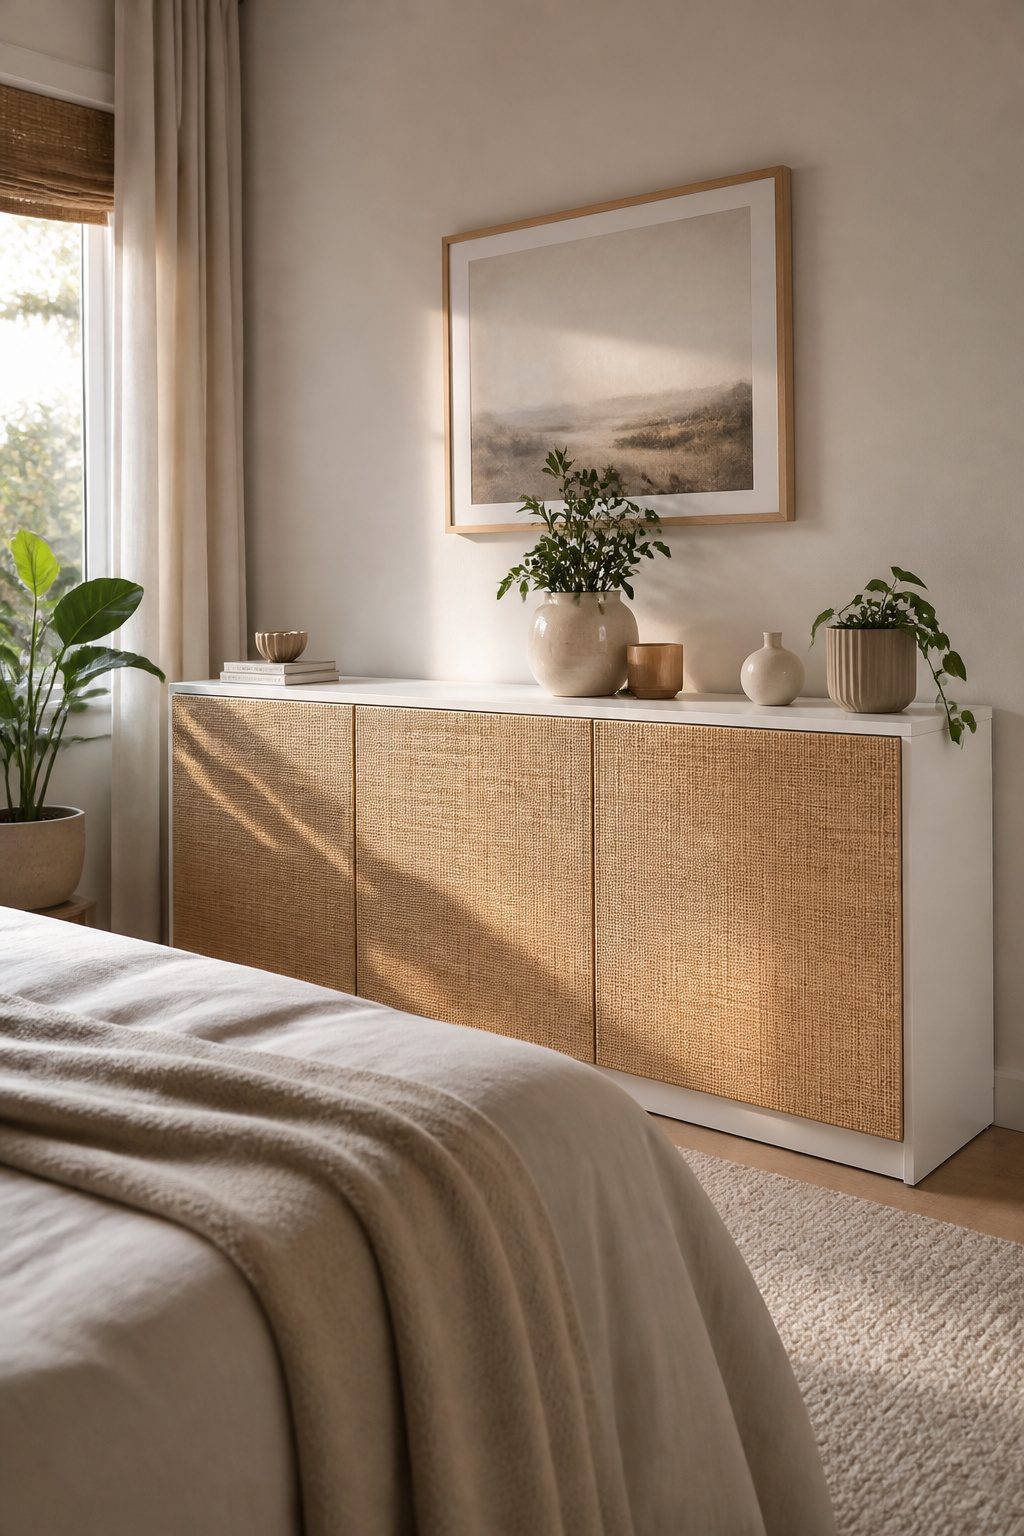
Peel-and-stick grasscloth turns the flat, forgettable doors of a Besta unit into something that reads like a found vintage piece.
The material itself has irregular fibers that catch morning light differently than vinyl or laminate ever could, and in a bedroom that variation keeps the eye from sliding past the furniture as if it weren’t there.
The EKET runs about $75 and works for tight corners, but its cube proportions feel more dorm room than restful. The Besta’s longer, lower silhouette suits a bedroom better, and the grasscloth reinforces that calm, horizontal line.
Corners are where this hack lives or dies.
Vinyl wraps can stretch and forgive; grasscloth has almost no give. I would cut the sheet slightly oversized, press the center flat first, then work outward with a plastic scraper held at a low angle.
At the corner, snip the overlap diagonally so one flap tucks under the other rather than doubling up.
A hairdryer on low helps the adhesive set before you trim the excess with a fresh blade. Skip the heat and the seam lifts inside a month.
6. Gold Campaign
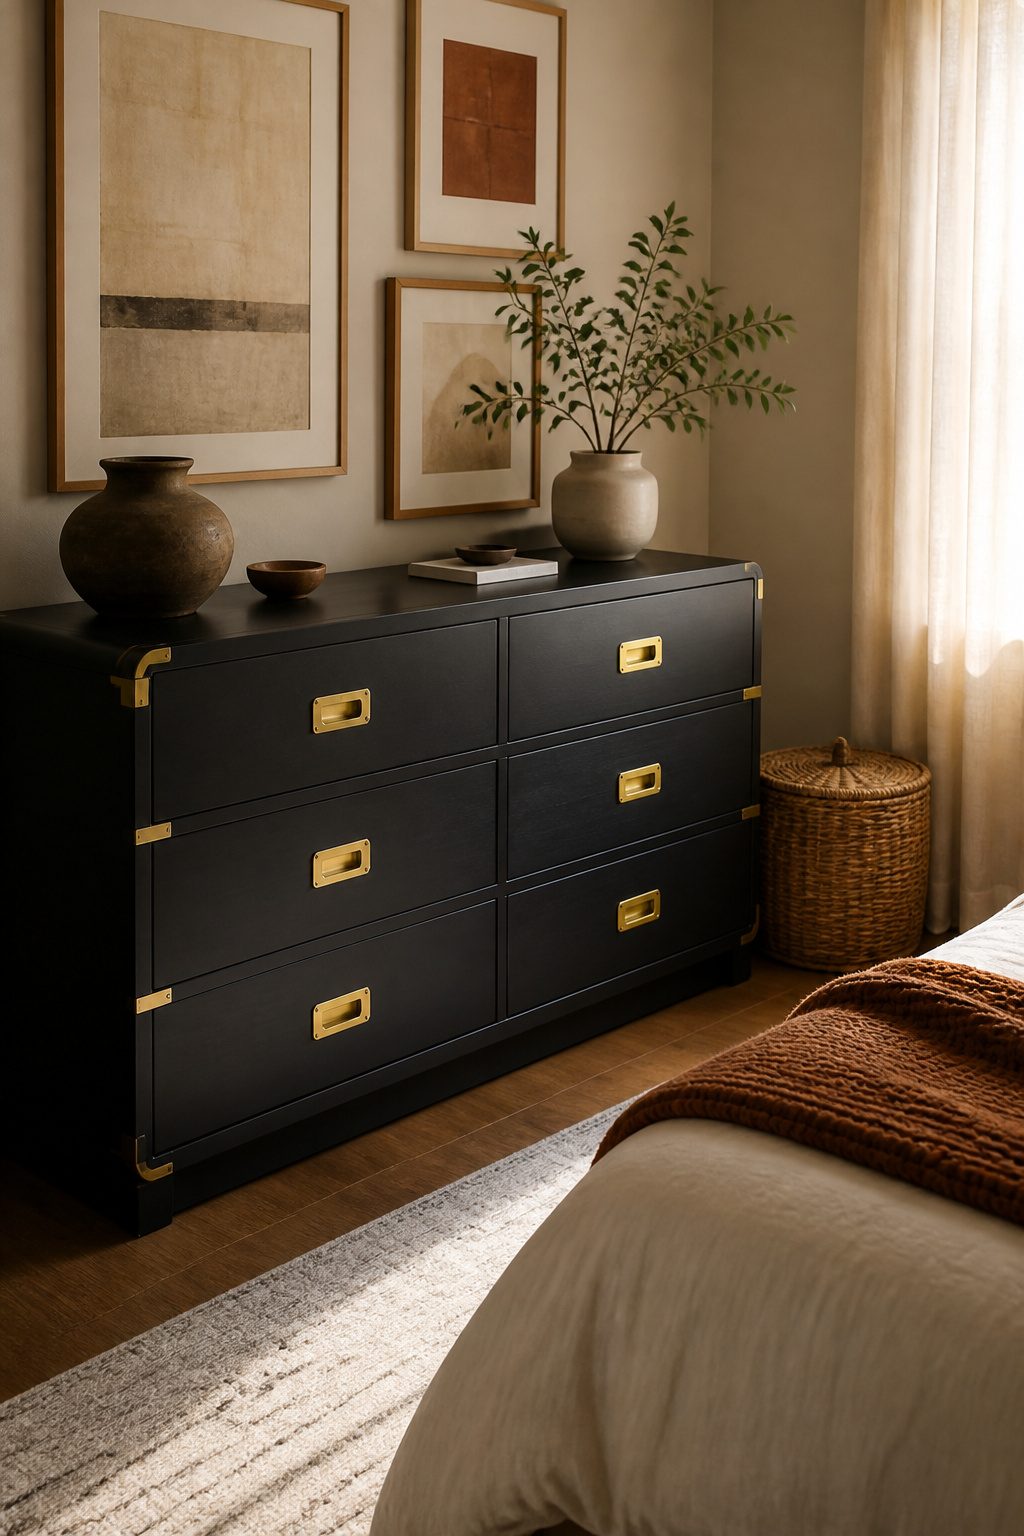
Brass hardware reads differently than gold paint, and the gap matters on a bedroom dresser you see every morning.
Solid brass pulls and corner braces warm up over time and take a polish; gold paint flakes at the edges where drawers get pulled a dozen times a day.
I would spend the extra on real brass for anything I touch regularly.
The screw spacing on Rast and Hemnes drawers is not universal, so measure before you order.
Rast uses a narrower pattern than Hemnes, and campaign-style corner brackets need holes that line up or you are drilling into particleboard that does not forgive a second try. Brackets with slotted holes save the headache.
Against MALM’s black or white finishes, this hardware does two different jobs. On black, brass pops hard and reads modern; on white, the same brass softens and leans traditional.
I would pick black if I wanted the dresser to feel like one deliberate piece, white if I needed it to disappear into a rented bedroom with existing trim.
Gold paint on either finish just looks like a coating waiting to chip.
7. Cool Hardware
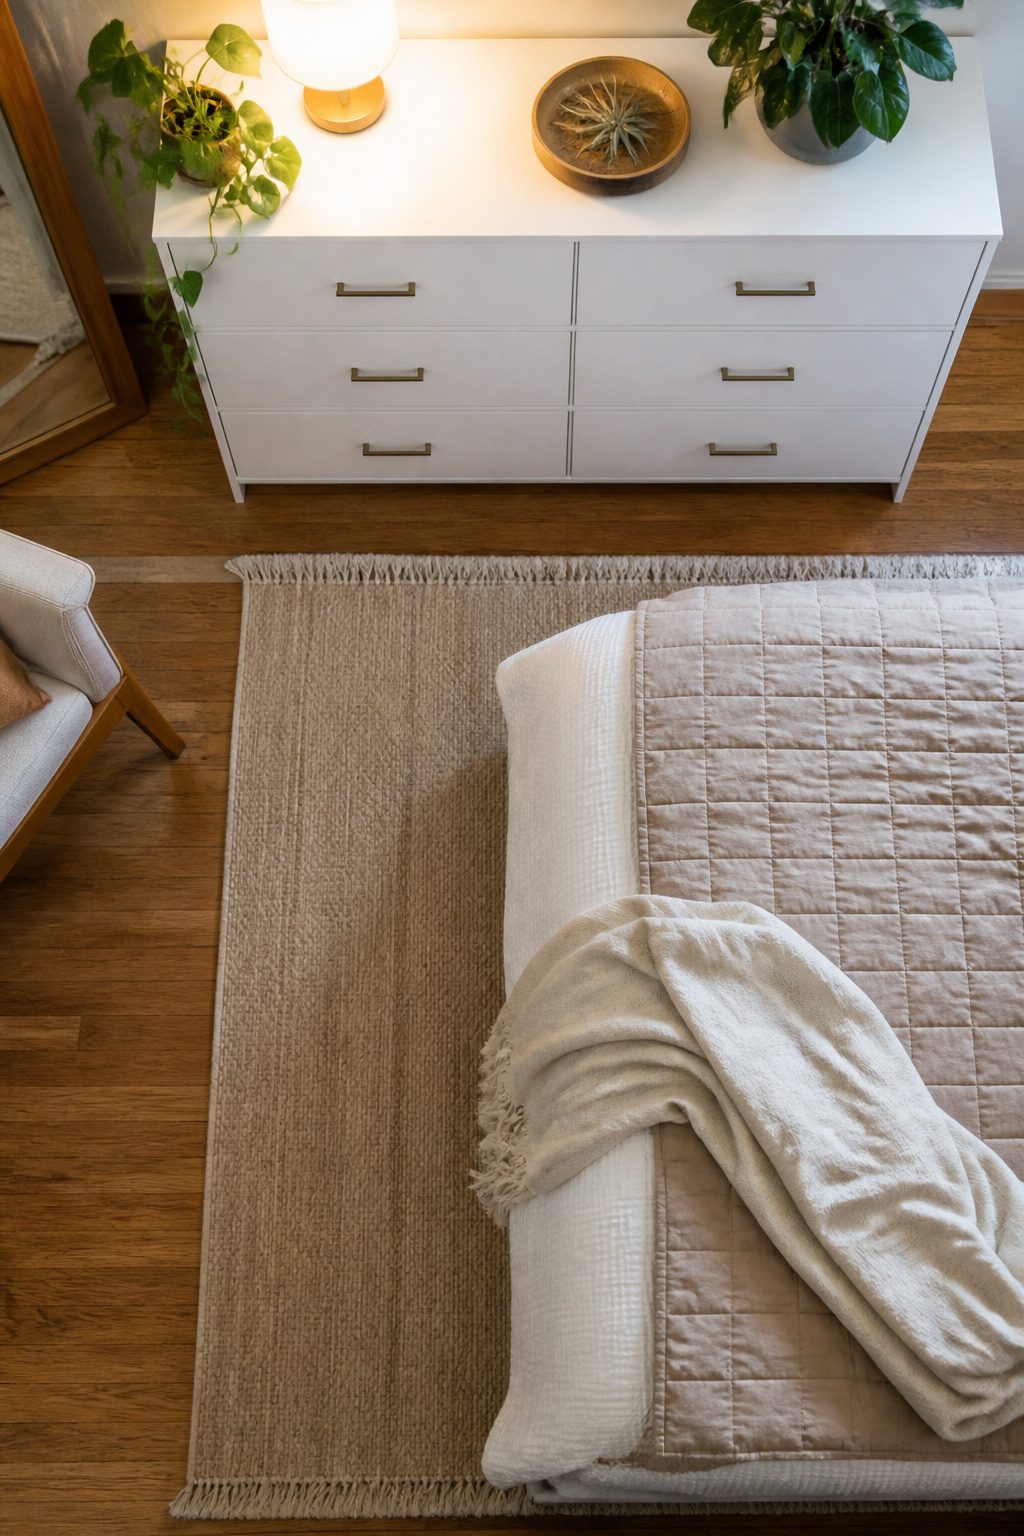
Swapping the hardware is the fastest way to change any IKEA dresser, since most of those drawers ship with the same bland pulls drilled at 3-inch or 5-inch centers.
Leather tabs, ceramic knobs, and machined metal pulls all thread into those holes, but the spacing limits what fits without extra work.
If you find a pull you like in a different width, you will need to fill the old holes and drill new ones.
Wood filler works on painted dressers; on stained ones, I would use a dowel plug cut flush and touched up with a matching marker rather than trying to blend filler into grain.
The patch takes stain differently than the surrounding wood, so a slightly darker touch-up usually hides better than an exact match.
For sources, machine shops on Etsy sell aluminum and brass pulls in precise lengths, and a few leather workers offer hand-stitched tabs with the holes already punched to IKEA spacing.
Ceramic knobs read softer and more cottage than metal, which is why I would use them on a painted white dresser and skip them on anything with visible wood grain.
Machined metal wins for modern bedrooms, but the weight adds up; a solid brass pull on every drawer of a six-drawer Hemnes makes the front heavy when you open it empty.
Cost stays low because you are buying pulls, not replacing furniture. Most bedrooms need 6 to 8 pieces of hardware, and even at the upper end of handmade prices you are still under what a new dresser costs.
8. Applique for the Win
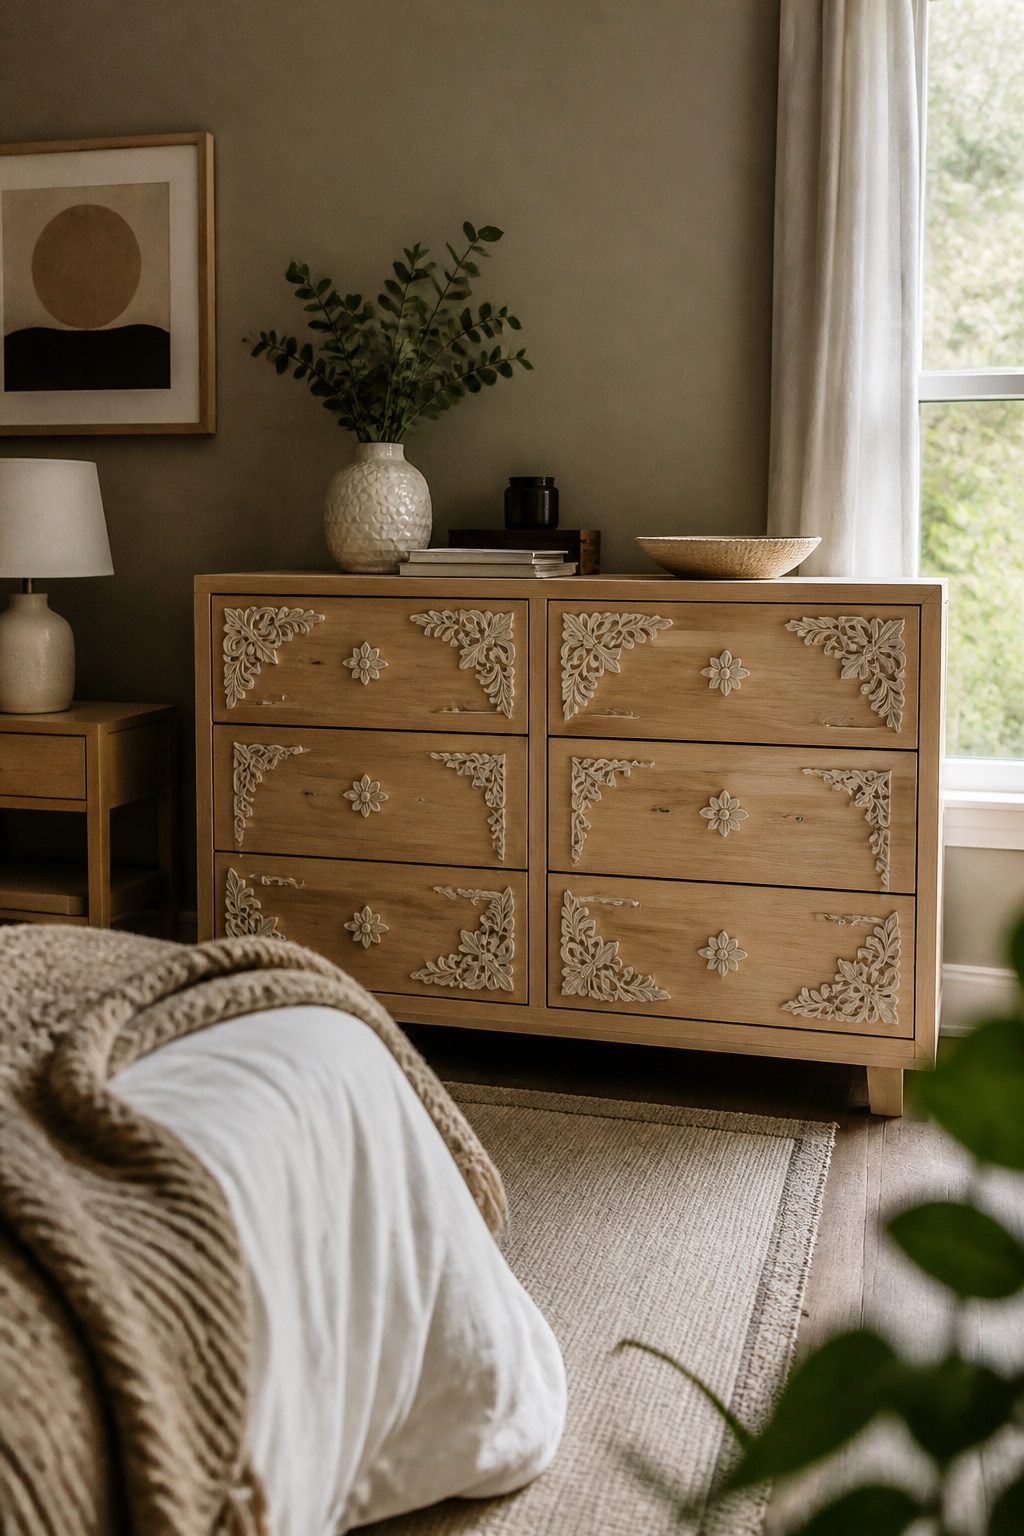
Wood appliques turn a flat IKEA dresser panel into something that reads hand-carved, and the whole job stays within reach of a glue bottle and a Saturday morning.
I would start by sorting the appliques into a dry layout before any adhesive touches the surface, because once the glue sets, the only fix is damage control.
For raw wood, a yellow wood glue gives a bond stronger than the applique itself; on a factory-painted dresser, construction adhesive formulated for non-porous surfaces is the safer bet, since ordinary wood glue will skin over without ever really biting.
Placement matters more than pattern density.
I keep every applique at least half an inch clear of the drawer perimeter, because a lip that looks innocent when the drawer is closed will catch your knuckle or snag a sweater every time you reach for socks.
After the glue cures, prime before you paint. Unprimed detail drinks in the first coat and flattens out, so the shadow lines you paid for disappear under a single layer of color.
A shellac-based primer seals the applique and the original finish together, and two thin topcoats after that keep the relief sharp enough to catch morning light.
9. Rast Hack
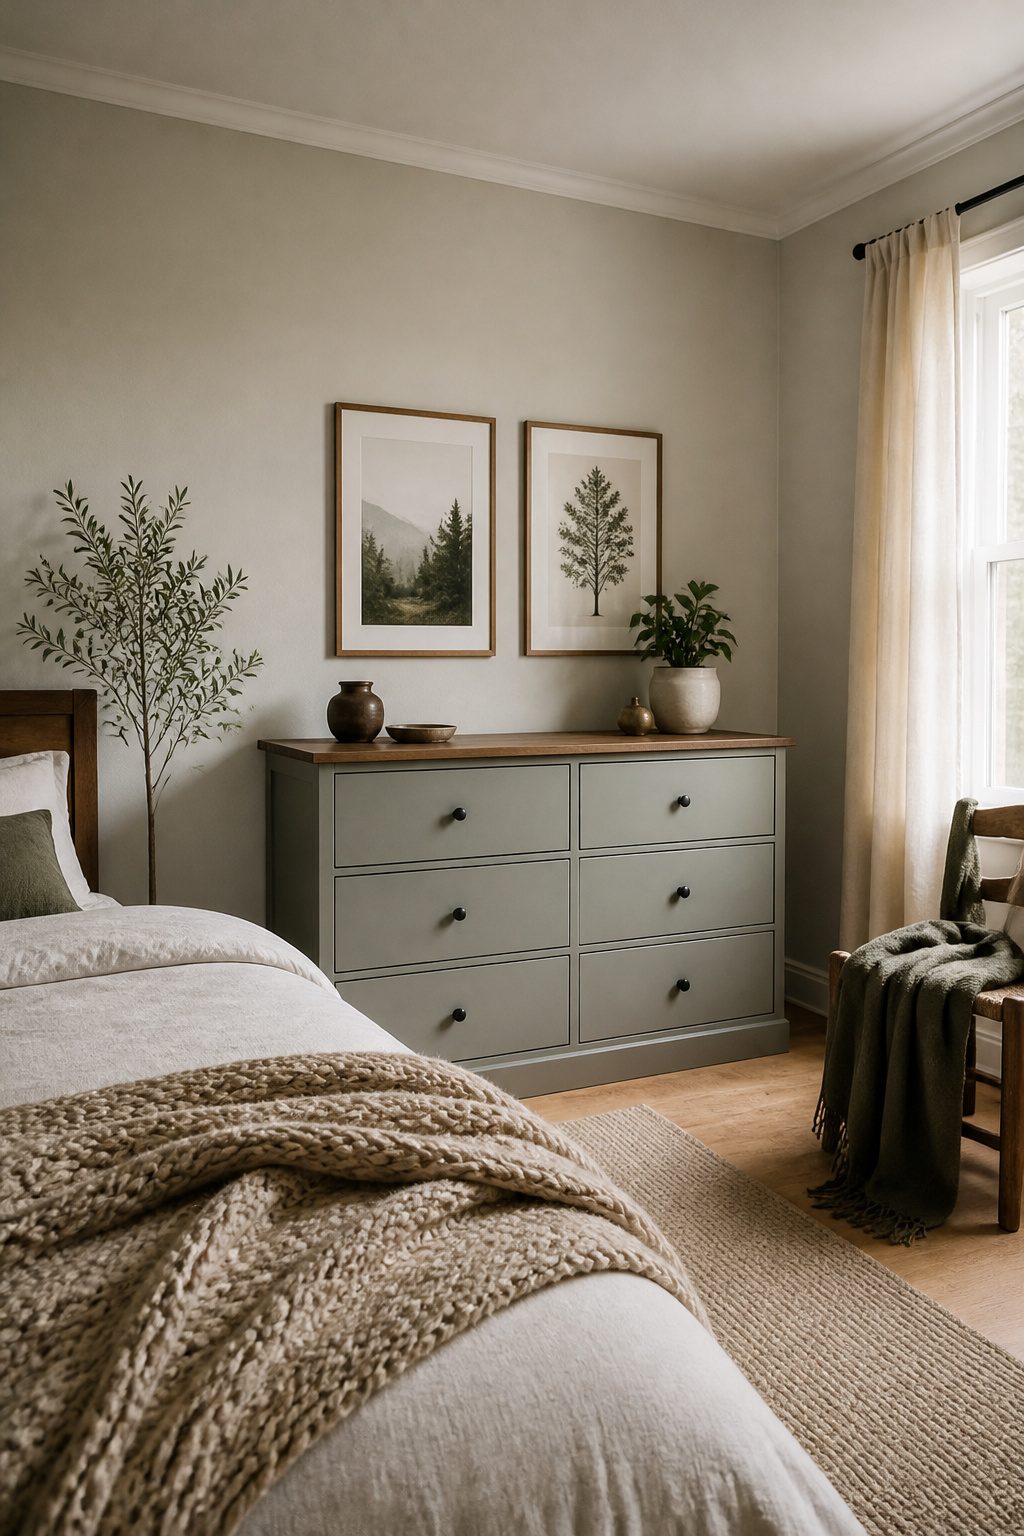
The $35 Rast pine chest is solid wood, not particleboard, which means you can sand it smooth, stain it evenly, and not worry about the edges swelling when paint hits them.
That alone makes it the best first hack for anyone who has never taken a sander to IKEA furniture.
Most beginners reach for paint, and the Rast takes it well, but I would stain the top and paint the body instead of coating the whole thing one color.
The contrast hides the simple build, and it reads as intentional rather than "I covered cheap pine."
I have seen the Rast finished in navy with a walnut stain, sage with raw wood, and straight matte black with brass knobs.
The hardware swap matters more here than on dressers twice the price because the blank wood pulls that come with it look exactly like what they cost.
Spend the extra $12 on bin pulls or round brass knobs; it is the single move that elevates the piece from dorm room to bedroom.
The three-drawer size is small enough that one person can flip it in a single Saturday, sand through topcoat included.
My only caution is the drawer bottoms, which are thin. Load them with socks and t-shirts, not books.
10. Frugal and Quick
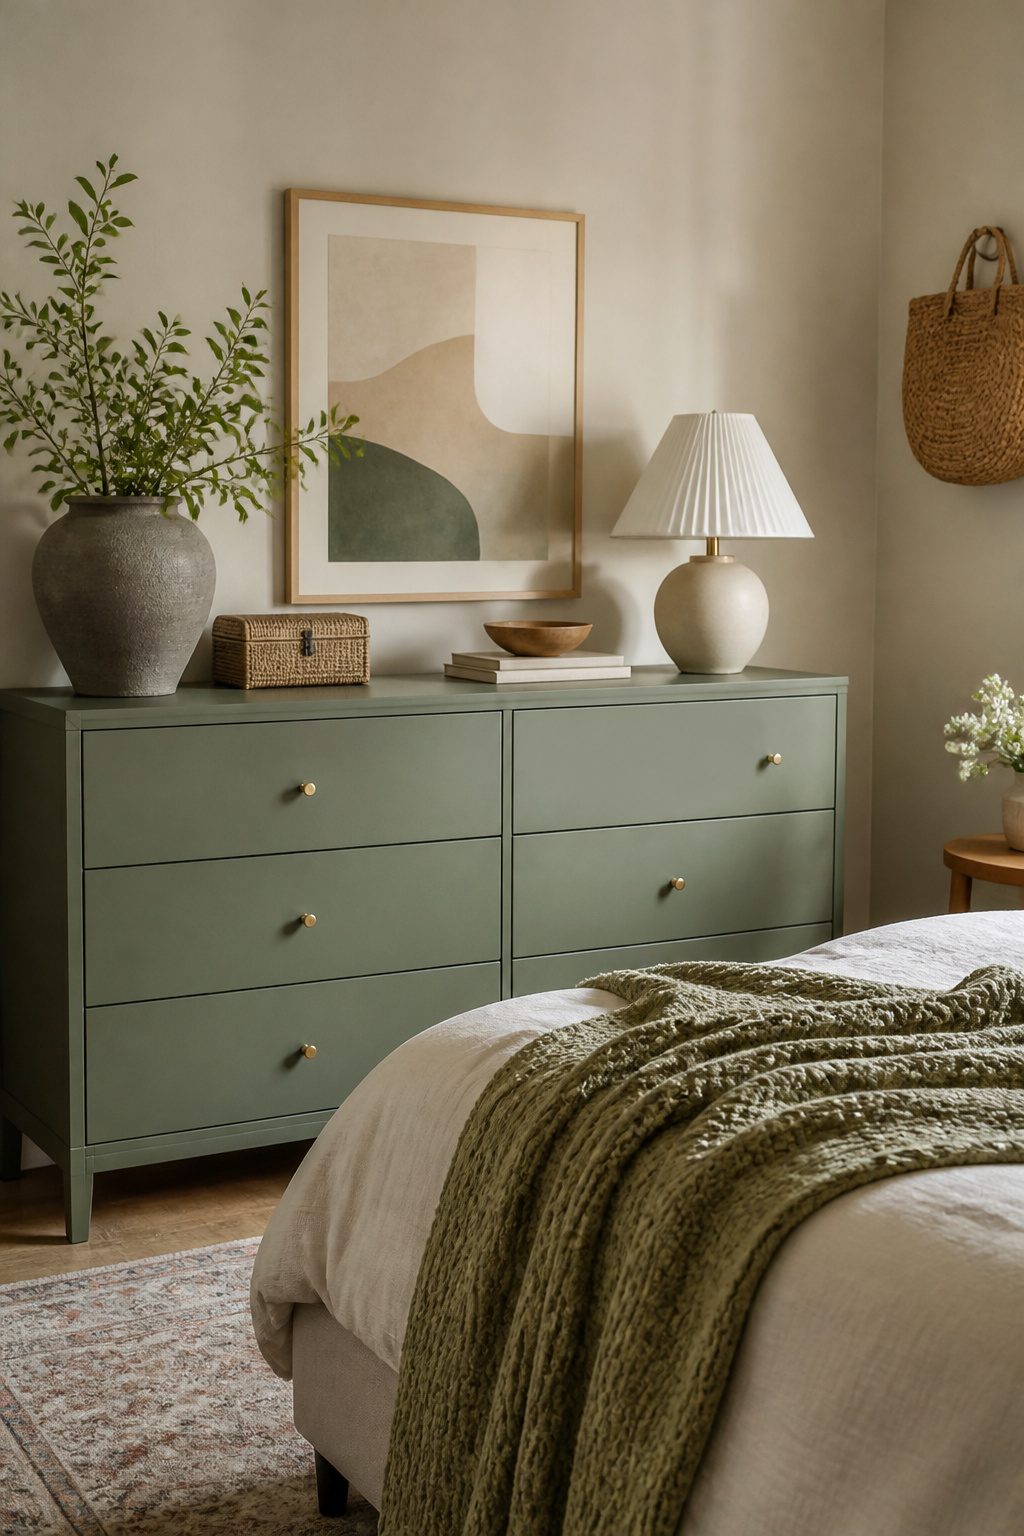
IKEA’s white, black-brown, and gray finishes all take paint without sanding if you hit them with the right primer first.
The one that actually sticks to laminate is a shellac-based primer; it bites into the slick surface in a single coat and dries in 45 minutes.
I would skip the bonding primers that promise no-sand adhesion on laminate, because in my experience they still scratch off with a fingernail after a week.
Tape off the drawer edges and hardware holes, roll the primer on thin, and follow with two coats of latex in whatever color matches your bedding.
Four hours after the final coat, the surface is dry enough to sleep beside; the drawers can close without sticking by morning. The smell is the real downside.
Shellac primer reeks until it cures, so run a fan pointed out the window and accept that the room will feel like a hardware store until dinnertime. For a same-day project on a $40 dresser, that is a reasonable price.
11. Mid-Century Modern
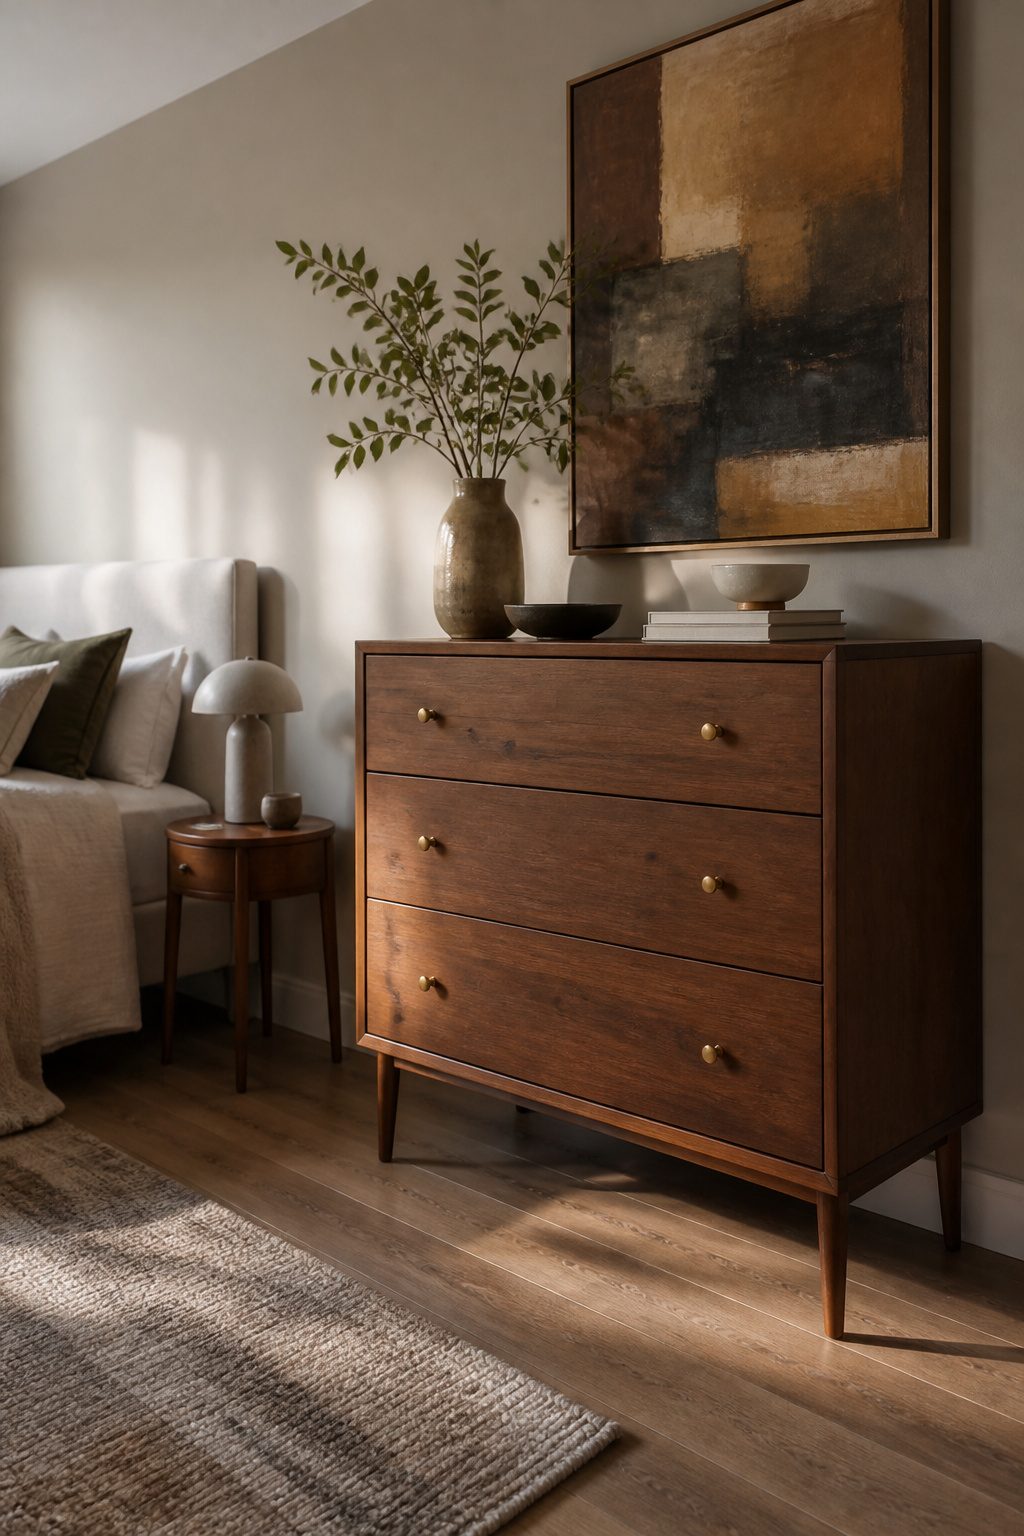
The TARVA takes stain better than almost anything else IKEA sells, because the unfinished pine has no lacquer to fight through.
MALM works too, but only after sanding through its factory coating, and even then the particleboard edges will drink the color differently from the veneer faces. I would start with TARVA every time.
Tapered legs sell the look, yet angle matters more than height. A leg that kicks out at roughly 15 degrees reads mid-century; a straight vertical post just reads raised.
You can buy reproduction legs with the splay already built in, or cut your own from oak and plane the taper. Brass pulls with a simple curved bar or a small conical knob finish the period silhouette.
Leather pulls, which work well on MALM elsewhere, feel slightly off here; the warmth of walnut or teak asks for metal with some weight to it.
One trade-off: the TARVA’s drawer boxes are soft pine, so the sides will dent if you lean too hard on them.
The face is what shows, and that face stains to a convincing walnut tone for the cost of a weekend and a can of oil-based color.
12. Tarva Turns Bar Cabinet
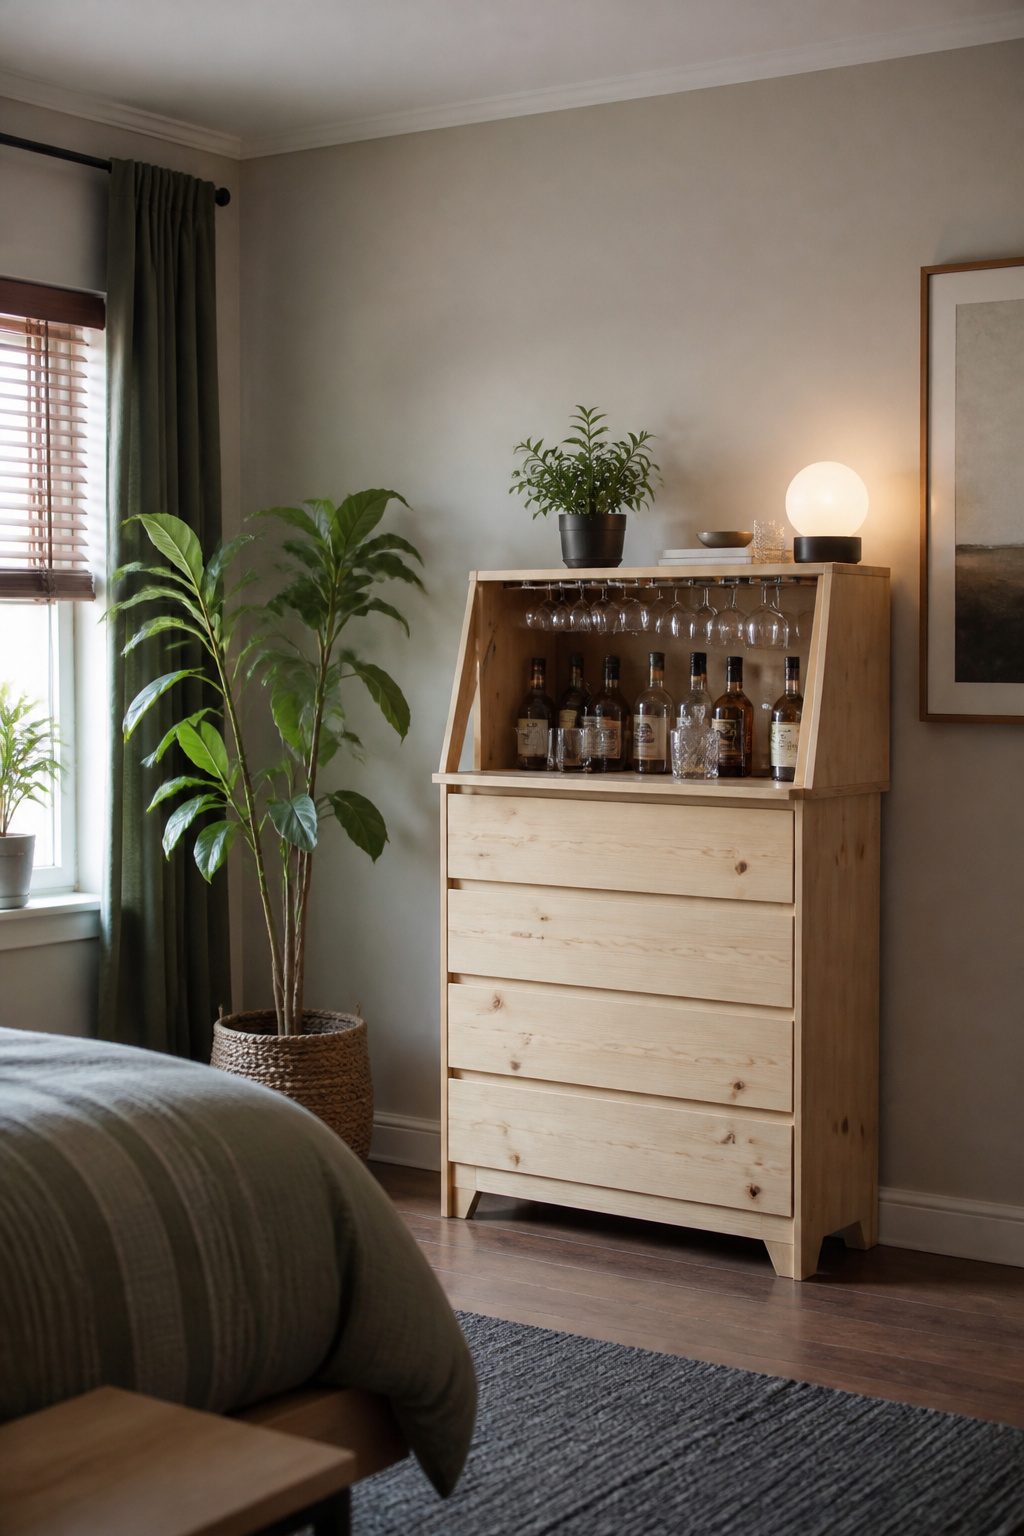
The Tarva’s shallow depth is the first thing to check before you commit to bottles. Most liquor bottles need at least 12 inches of clear cabinet depth to stand upright with the door closed, and the Tarva skims that line.
Measure your tallest bottle with the cap on, then add an inch for the back panel. If you are tight on space, lay bottles on their sides in a drawer with a simple wooden rail to keep them from rolling.
For glass storage, a stemware rack mounted to the underside of the top overhang keeps wine glasses accessible and free of dust.
The Tarva’s solid wood frame takes screws well, so you can set the rack back far enough that glasses do not knock into knees when the drawer below is open.
I would use the shallow top drawer for bar tools and napkins, the middle for mixers, and leave the bottom empty for backup bottles or a small ice bucket.
I would skip this setup in a primary bedroom. The clink of bottles, the need to restock, and the visual clutter of glassware all fight against the calm I want where I sleep.
In a guest room, though, the same piece feels generous without being expected. Visitors notice it, use it, and you are not the one living with it every morning.
13. Scarf Organizer
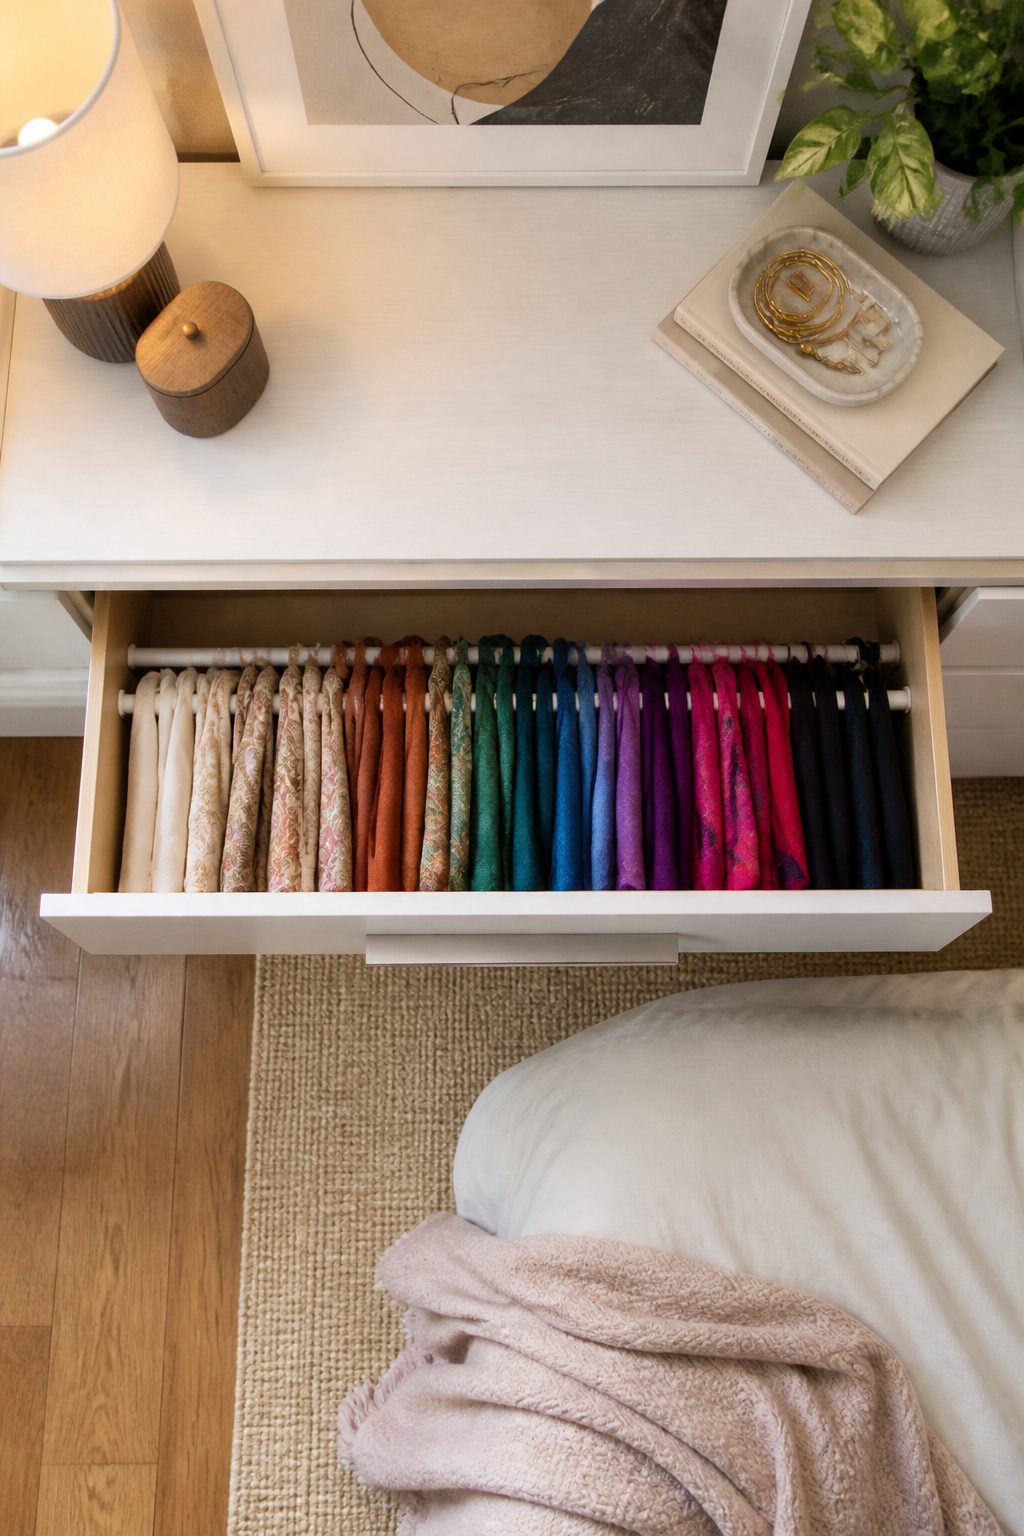
A shallow top drawer in a bedroom dresser is the right place for scarves, but only if you retrofit it so nothing slides under something else.
Tension rods set front to back, spaced about 6 inches apart, turn the drawer into a filing cabinet for fabric: each scarf hangs folded over its own rod, silk and wool both visible and untouching.
The rods press against the drawer sides, so installation takes a minute and leaves no holes worth worrying about when you move out.
Pegboard is the sturdier option if your scarves are heavy or if the drawer is wide enough that rods bow in the middle.
Cut it to the drawer floor, add dowels in a grid, and you get slots sized to the scarf width.
I would skip felt dividers sold for this purpose; they collapse in six months and cost more than a 4-foot tension rod from the hardware aisle. The real limit is drawer height.
Much under 3 inches and even a folded scarf stacks instead of hangs, which puts you back to wrinkles. Check that first, because the method does not matter if the space does.
14. Triple the Tarva
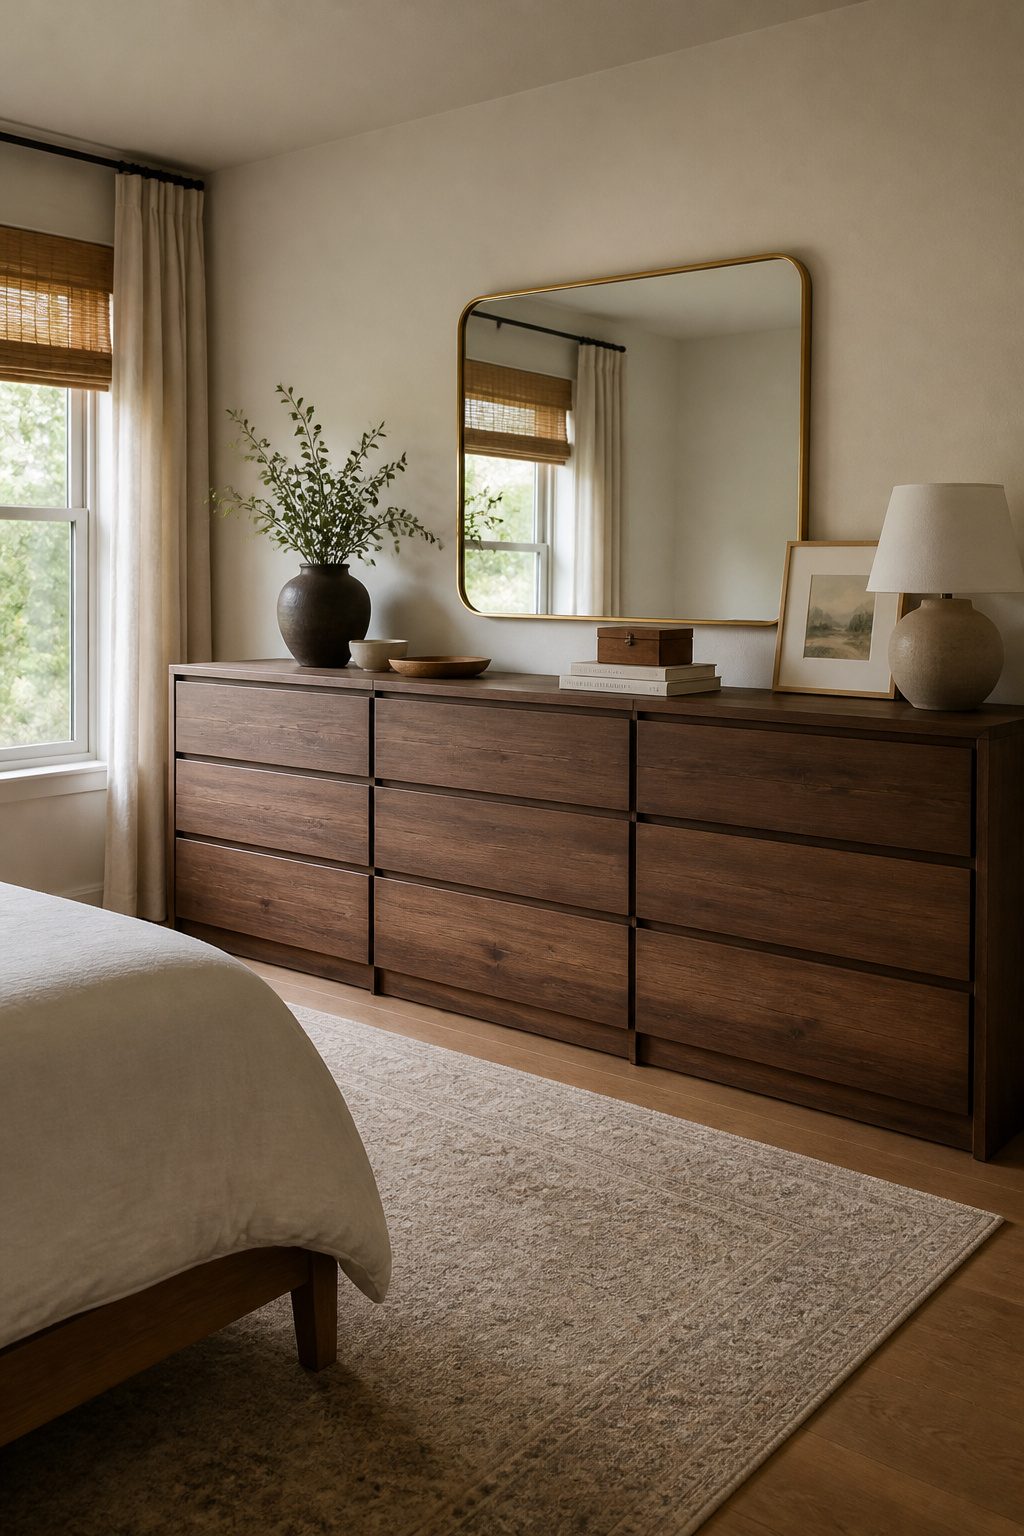
Three Tarva chests, fastened side by side, give you a single dresser run wide enough for a master bedroom wall. Aligning the drawers across units so the gaps read as intentional, not sloppy, takes the most care.
I would start by clamping the frames together before driving screws through the side panels where they meet, then check that every drawer front sits flush with its neighbor before you add hardware.
A single top, cut from plywood or a finished panel, ties the three boxes into one piece and hides the seams.
The original Tarva comes unfinished, so you have room to stain the whole assembly walnut and swap in aged brass pulls for a look that reads mid-century rather than dorm-room flat-pack.
The stacked configuration works if floor space is tight, but side-by-side keeps the drawer heights consistent and the top surface useful for a mirror or tray.
Either way, budget for a weekend and expect to spend under a hundred dollars on the top, stain, and hardware if you already own the chests.
15. Textured Linen Panels
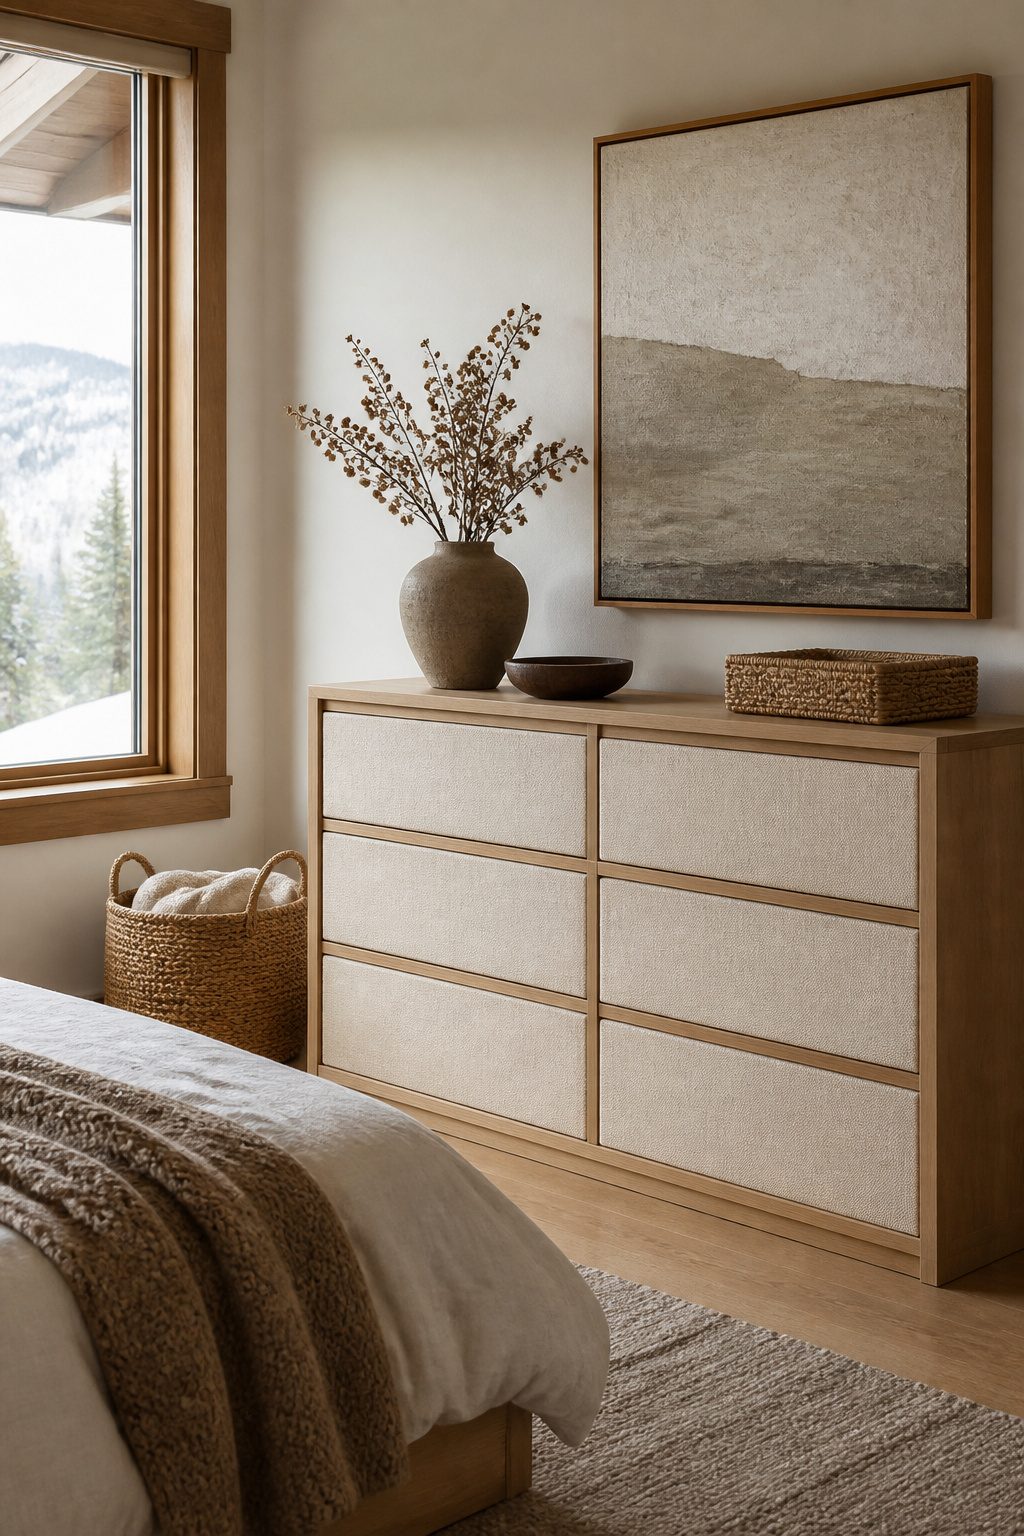
Linen on drawer fronts turns a flat-pack dresser into something that belongs in a mountain bedroom, but the adhesive choice decides whether it stays crisp or sags within a month.
Spray adhesive with a high-tack, repositionable formula gives you the working time to smooth wrinkles without the instant grab that ruins alignment.
I would skip standard craft glue; it soaks through linen weave and leaves dark spots that read as stains against light neutrals.
Wrap order matters for clean edges.
Adhere the panel face first, then pull the fabric tight over each edge and finish on the back side, where a row of small staples through the thin IKEA fiberboard holds tension better than glue alone.
Trim bulk at corners by cutting the fabric on a diagonal before folding, or the overlap reads as a lump from the front.
Matte linen in oatmeal, warm gray, or faded sage fits the muted palette I look for in a Park City bedroom. A slight sheen from satin or polyester blends fights the calm, natural mood that makes mountain spaces feel grounded.
Durability is the real downside: linen scuffs at corners faster than paint, so this hack suits a dresser for folded clothes rather than one that takes daily abuse from jeans and hardware.
Frequently Asked Questions
How can I customize my IKEA dresser?
Paint it with shellac-based primer first for grip on laminate, swap the hardware at standard 3-inch or 5-inch centers, or add overlays and appliques with construction adhesive. Each move costs under $40 and changes how the piece reads in the room.
What are some easy IKEA dresser hacks?
Painting with primer and latex takes four hours to dry enough for use; swapping hardware threads into existing holes; and peel-and-stick covers like grasscloth or linen need only a scraper and hairdryer. All three fit a single afternoon.
Can I turn my IKEA dresser into something else?
The TARVA converts to a bar cabinet if you check bottle height against its shallow depth first, and three TARVA units side by side become a full master-bedroom dresser run.
A changing pad on top of any dresser also works with no structural change.