
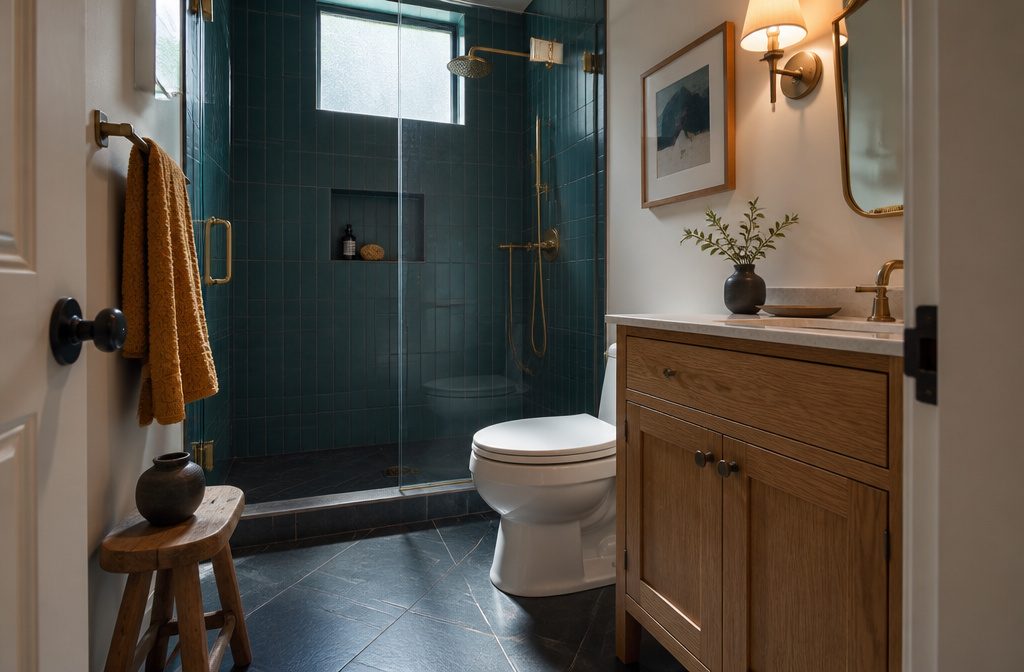
A full bathroom remodel replaces fixtures, surfaces and finishes in a single bathroom, either within the existing layout or by moving plumbing and walls to reconfigure the space.
Moving a toilet or shower drives cost faster than any other decision because it means rerouting pipes and wiring.
Most projects cost $3,000 to $30,000, with an average around $12,115, and take 2 to 4 months for a small guest bath or 6 to 9 months for a larger primary bath with layout changes.
1. Set the Scope, Budget, and Design
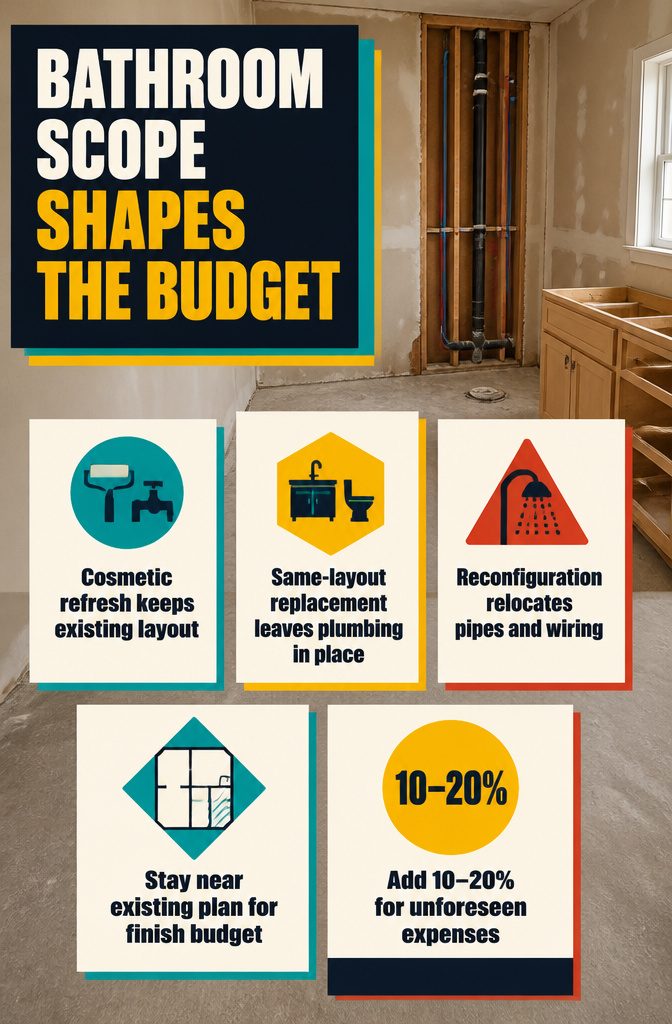
A full bathroom remodel can go three ways. A cosmetic refresh keeps the layout and updates paint, fixtures, and hardware.
A same-layout replacement swaps out everything — vanity, toilet, tub, tile — but leaves plumbing and walls where they are. A full reconfiguration moves fixtures, which means relocating pipes and wiring, and that is where cost climbs fastest.
Layout changes drive the budget harder than any other decision. Moving a toilet or shower means rerouting plumbing, and staying close to your existing floor plan leaves more money for the finishes that show.
Size matters too: more square footage means more tile, more labor, and more hours on the job.
Set a budget that includes materials, labor, and a contingency. Add 10 to 20 percent for unforeseen expenses — damaged subfloor, outdated wiring, or plumbing that needs replacement once the walls come down.
Get detailed estimates from contractors that separate material cost from labor, then decide where you want to spend and where you are willing to compromise.
2. Check Existing Conditions, Requirements, and the Project Plan
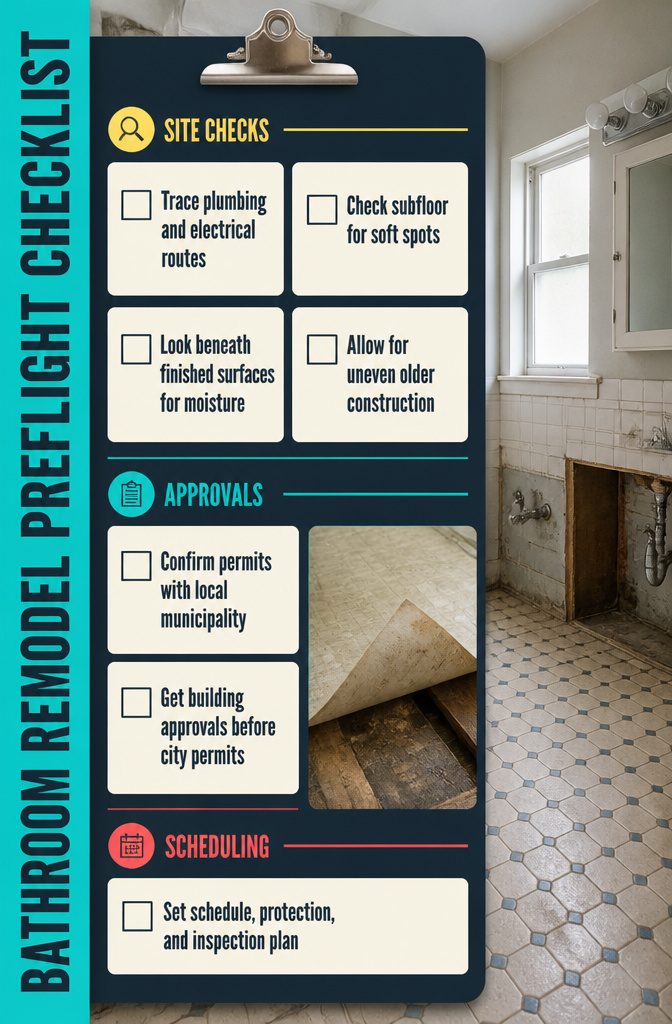
Before anything comes down, you need to know what you’re working with. Walk the space with your contractor and check where the plumbing lines run, where the electrical is fed from, and whether the subfloor feels soft or spongy underfoot.
Pull back a corner of flooring if you can — moisture damage and outdated wiring often hide behind finished surfaces and show up only after demo starts.
Homes built 50 to 100 years ago rarely run straight by today’s standards, so budget a little room for what gets uncovered.
Permits come next. Most bathroom remodels that touch plumbing, electrical, or structure need one, and your municipality sets the timeline.
In New York, co-op and condo buildings add a second layer: you’ll need alteration agreements, contractor insurance certificates, and approval from building management before the city permit even matters.
Your contractor can walk the permit application through, but missing either approval can stop work cold.
Schedule a pre-construction meeting once the plan is set. Your project manager and superintendent should present the construction schedule, explain how they’ll protect the rest of the house, and flag anything that might disrupt your routine.
This is when you ask about inspection windows, material lead times, and what happens if the plumber finds a buried cast-iron stack that needs replacing.
3. Select and Order Materials
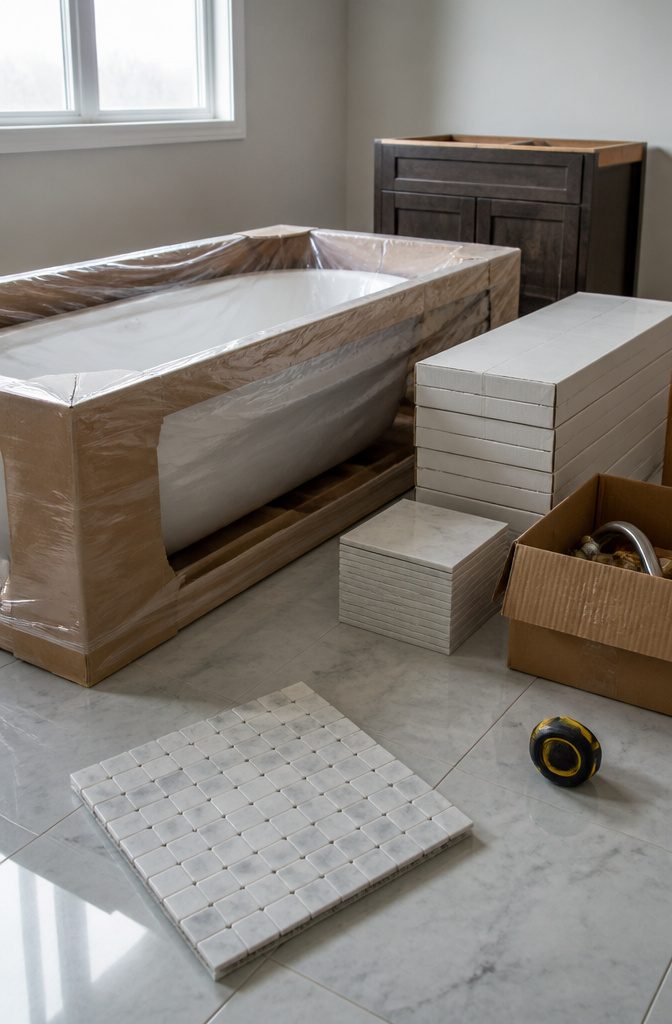
Once you have the design locked down and the measurements confirmed, order the bathtub about a month before demolition starts — it’s the one piece that can hold up framing if it arrives late.
Tile gets ordered all at once for the whole area, plus a box or two extra to cover cuts and future repairs, and large items like the American Standard 2764.014M202 bathtub or Emser Tile F02DOWN-0635 flooring need that lead time built in.
Custom vanities, specialty tile, plumbing fixtures, and shower glass can stretch out weeks beyond stock products, so I confirm availability with the supplier before the crew shows up.
Changing a selection after work begins — swapping out tile mid-install or deciding on a different vanity — pushes the schedule back further than most people expect, because the new item restarts the lead time from zero.
4. Demolish and Prepare the Room
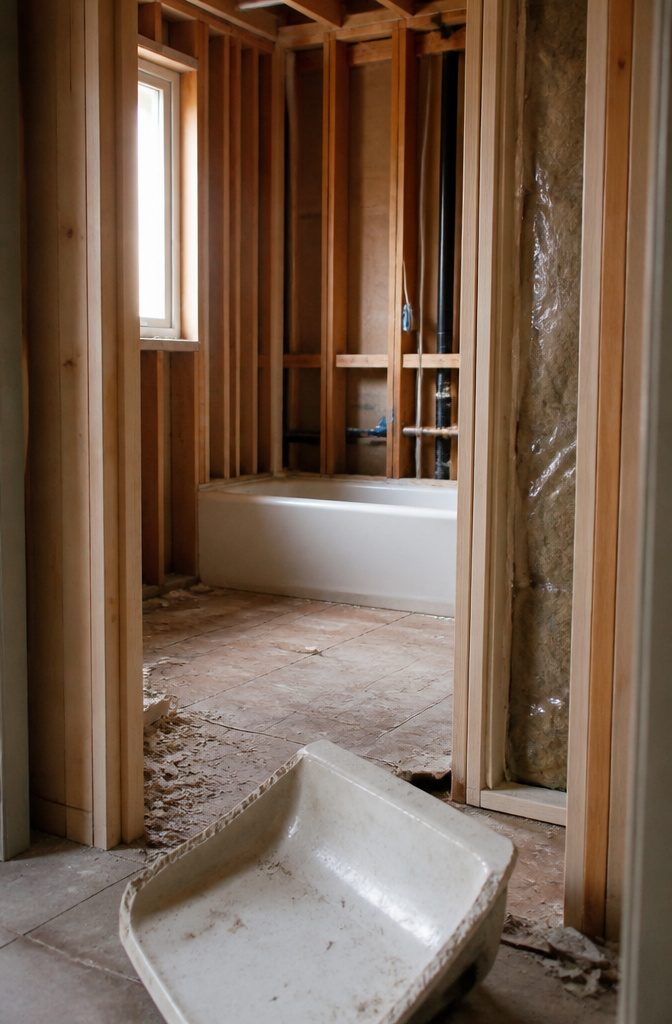
Shut off the water supply to the bathroom and drain the lines before you pull the toilet — Source 2 gives that order for a reason, and it saves you from mopping up whatever was still sitting in the trap.
Start there, then work outward to the vanity, tub surround, and tile. If you’re taking out a tub, remove the surrounding tile down to the studs so you can reach the plumbing connections and make room for the new fixture.
Cut insulation panels with a reciprocating saw rather than hammering them out.
The hammering tears the vapor barrier and sends fiberglass everywhere; the saw keeps the mess contained. Wear a mask, gloves, and goggles either way.
DIY demolition saves money only if you avoid damaging what stays. Source 3 notes that inexperienced work can crack drain lines, nick electrical runs, or gouge subfloor — repairs that cost more than hiring the demo out would have.
Once everything is out, inspect the subfloor and framing for rot, soft spots, or outdated wiring before framing or plumbing begins.
5. Complete Rough-in Work and Inspections
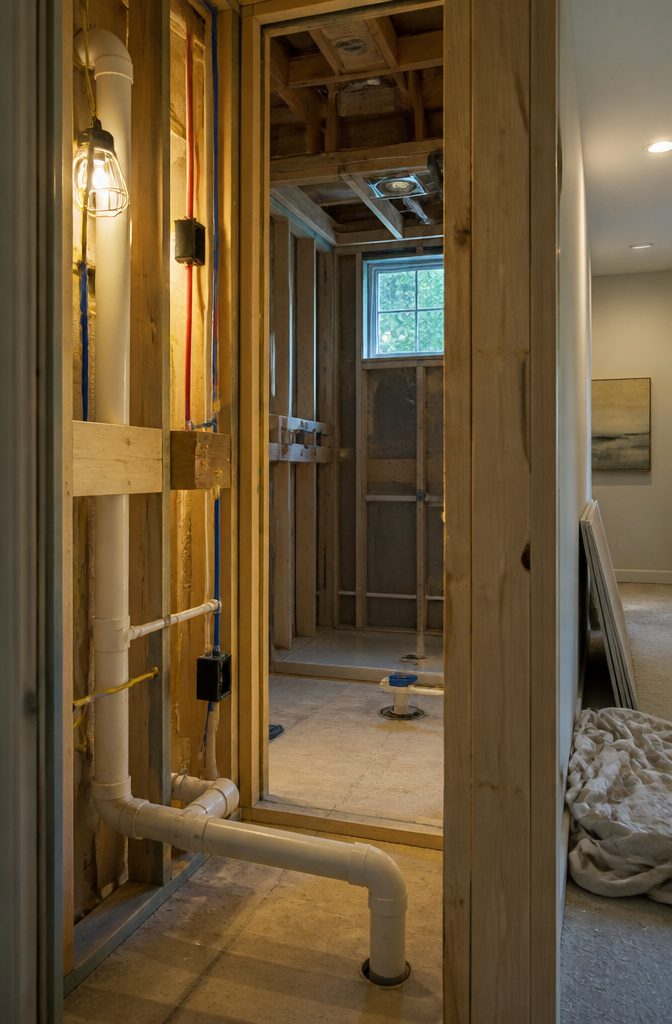
Plumbing, electrical and framing go in now before the walls close.
Supply lines, drainage, new circuits and any structural blocking get installed during this phase, which takes 2–3 days. The plumber runs pipes to fixture locations but does not mount the faucets yet.
The electrician adds circuits and rough wiring without installing switches or outlets. Framing adjustments happen at this stage if you moved a wall or door.
An inspector visits once rough-in is complete, usually within a day, and checks that plumbing, electrical and structural work meet code.
This inspection is required when your remodel includes any of those three trades. Surface changes alone—painting, swapping a faucet—do not trigger a permit or inspection.
The permit itself is pulled before demolition starts if you are changing plumbing routes, adding circuits or moving fixtures, so the inspection at this point closes the loop on that earlier approval.
6. Prepare and Waterproof the Walls, Shower, and Floor
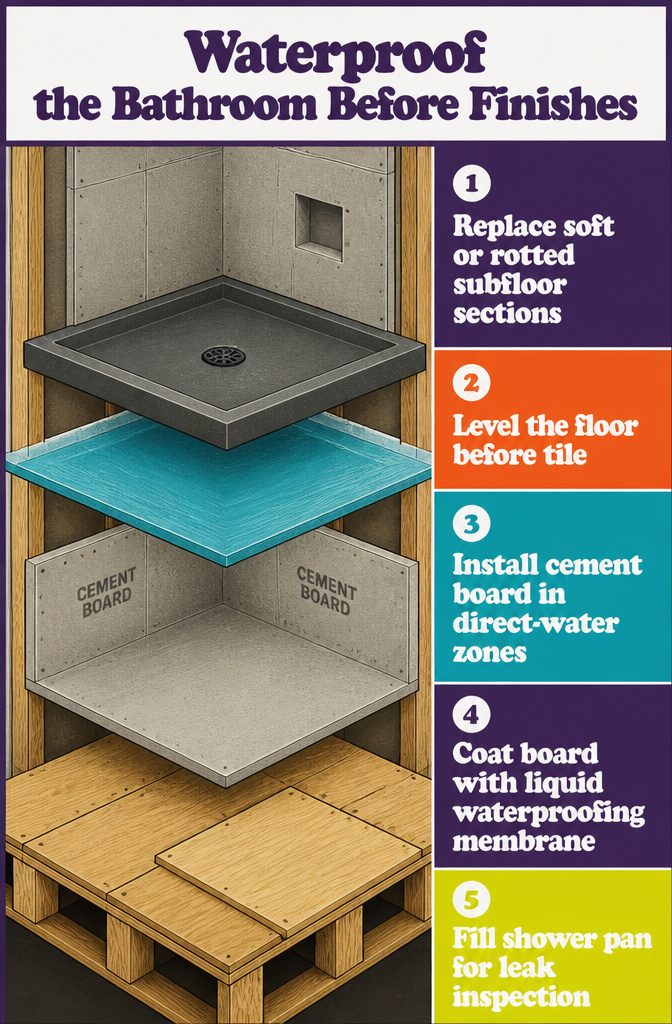
Once the rough plumbing passes inspection, the floor and walls need structural repair and waterproofing before anything permanent goes in. Check the subfloor first: if you find rot or soft spots near the old fixture, replace those sections now.
The subfloor must sit flat and level, especially under tile, which telegraphs every dip and ridge through the grout lines. Expect your crew to spend hours on this if the floor was never right to begin with.
Wall prep depends on location. Standard drywall works for most of the room, but use cement board on any surface that sees direct water—the shower enclosure, the tub surround.
Cement board alone is not enough. Coat it with RedGard or another liquid membrane once it is up; that layer stops moisture from reaching the framing if a grout joint ever cracks.
The shower pan goes in next, and it earns its own inspection.
The pan sits for several hours filled with water while the inspector watches for leaks into the subfloor. If it holds and drains clean, the job moves forward.
7. Install the Main Surfaces and Fixtures in Sequence
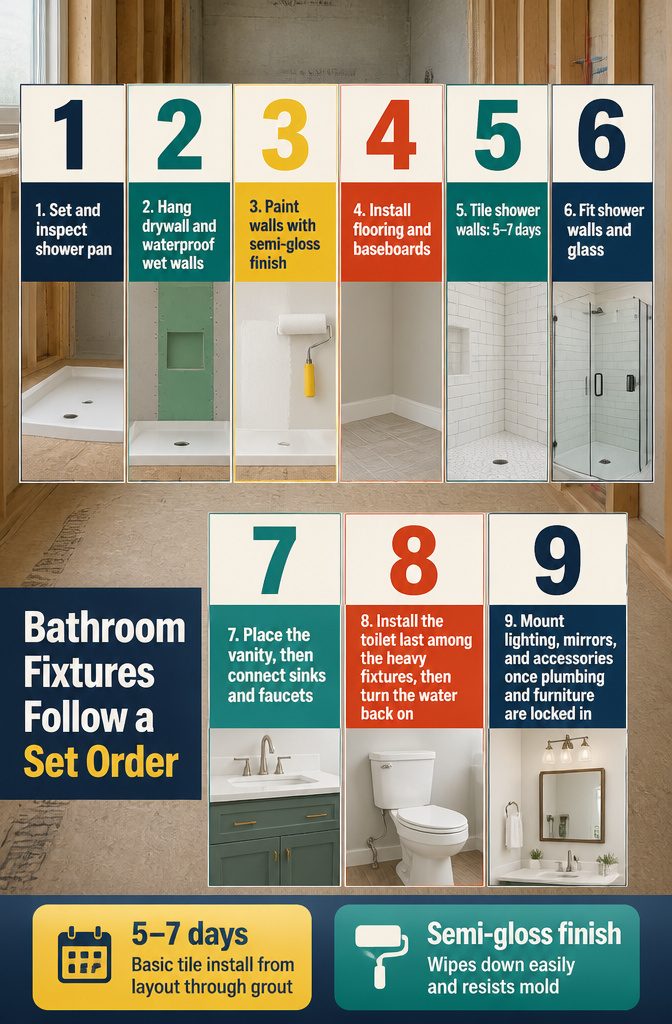
- Set the tub or shower pan before flooring goes down. The pan sits on the subfloor, and the inspector floods it for several hours to confirm it holds water and drains cleanly before you move on.
- Hang drywall next, cutting it to fit around the shower footprint and vanity location. Use cement board on shower and tub walls, then coat it with a waterproofing membrane.
- Paint the walls with semi-gloss finish, which wipes down easily and resists mold.
- Install flooring and baseboards. Cabinet-style vanities that sit flat on the floor go in before baseboards; furniture-style vanities on legs go in after.
- Tile the shower walls. A basic tile install takes 5–7 days from layout through grout.
- Set the shower walls and glass if you are using a prefab enclosure or frameless door.
- Place the vanity, then connect sinks and faucets.
- Install the toilet last among the heavy fixtures, then turn the water back on.
- Mount lighting, mirrors, and accessories once plumbing and furniture are locked in.
8. Finish, Inspect, and Close Out
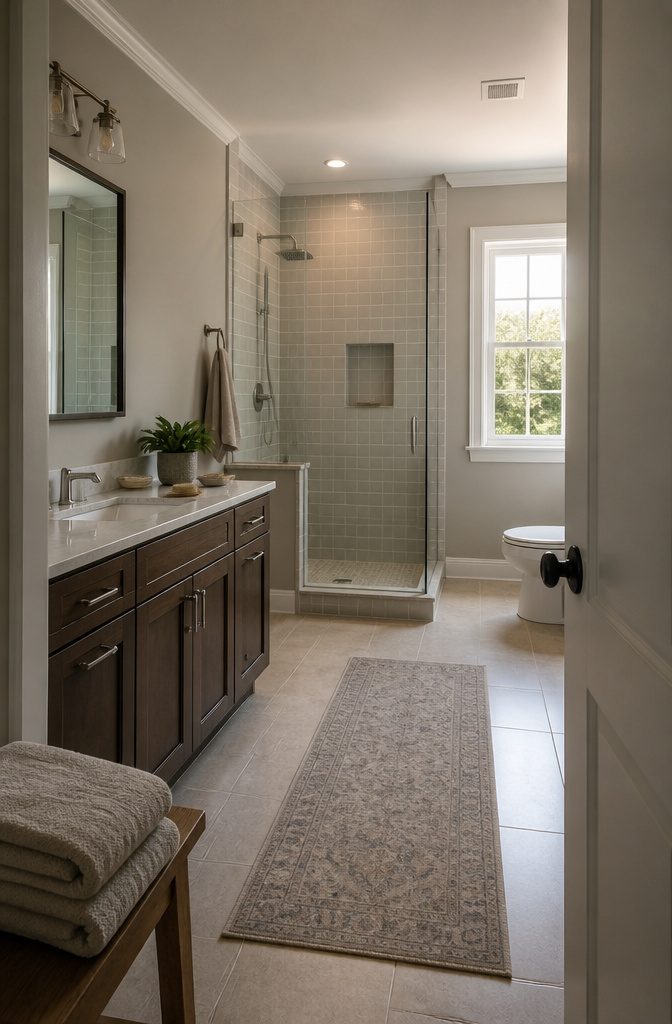
The finish work starts once plumbing, tile, and major fixtures are in place. Trim goes up around windows and doors, paint touches get completed, and anything left open—a corner bead, a caulk line—gets closed.
Finish carpentry runs about 1–2 days and covers the details that make the room look done rather than just functional.
After that, the contractor walks the space with you and builds a punch list: anything that sits crooked, any grout that needs a pass, any hardware that wobbles.
I treat this walkthrough as the last chance to flag something before the crew packs up. The list gets worked through in order, usually the same day or the next, and once you sign off the work is considered complete.
A five-year warranty typically starts at that signature, covering both materials and workmanship, so anything that fails in normal use gets addressed without reopening the budget.
What a Full Bathroom Remodel Costs
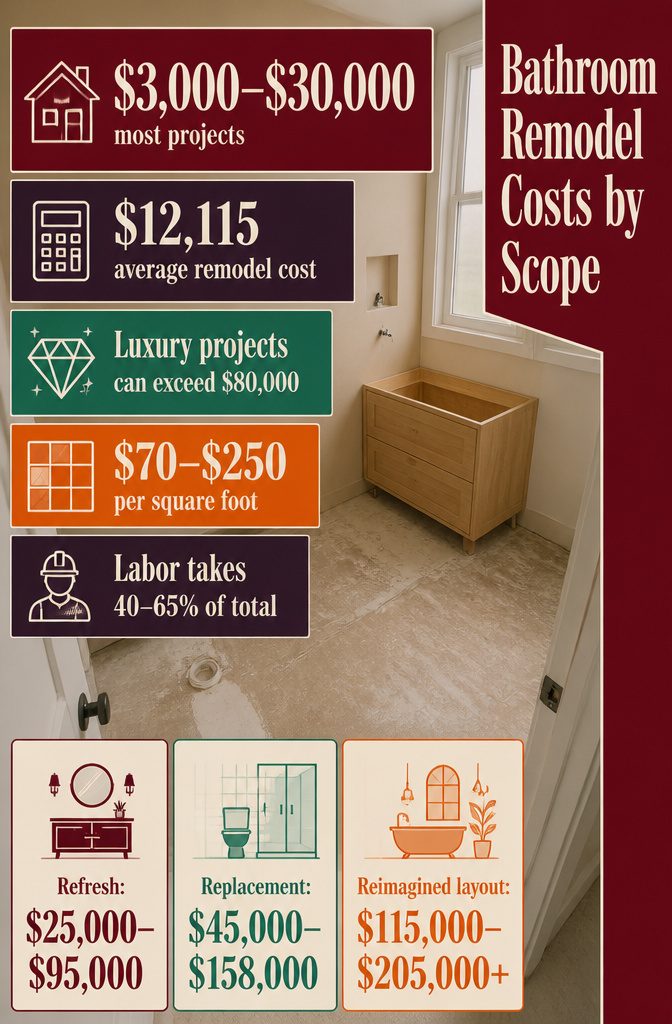
A full bathroom remodel costs $3,000 to $30,000 for most projects, with an average around $12,115.
Luxury work can top $80,000. Neil Kelly reports three tiers: a cosmetic refresh runs $25,000 to $95,000, a full replace within the existing layout costs $45,000 to $158,000, and a reimagined layout starts at $115,000 and can exceed $205,000.
Size moves the number, but not as much as scope does. This Old House breaks down a 50-square-foot bathroom by level:
A full remodel of a bathroom measuring 40–150 square feet costs an average of $18,706, including old material disposal and demolition fees. A cosmetic remodel that doesn’t account for demolition services costs roughly $11,582.
That $7,000 gap is demolition and the work it exposes.
Per-square-foot pricing lands between $70 and $250, but small bathrooms run higher because a toilet, sink, and vanity cost the same in 30 square feet as in 75. Labor takes 40 to 65 percent of the total.
In California, small remodels start at $15,000, midrange work runs $25,000 to $35,000, and high-end projects hit $50,000 to $100,000 or more. Moving plumbing, upgrading electrical, and dealing with old conditions you did not see coming all push the budget up.
How Long the Work Takes
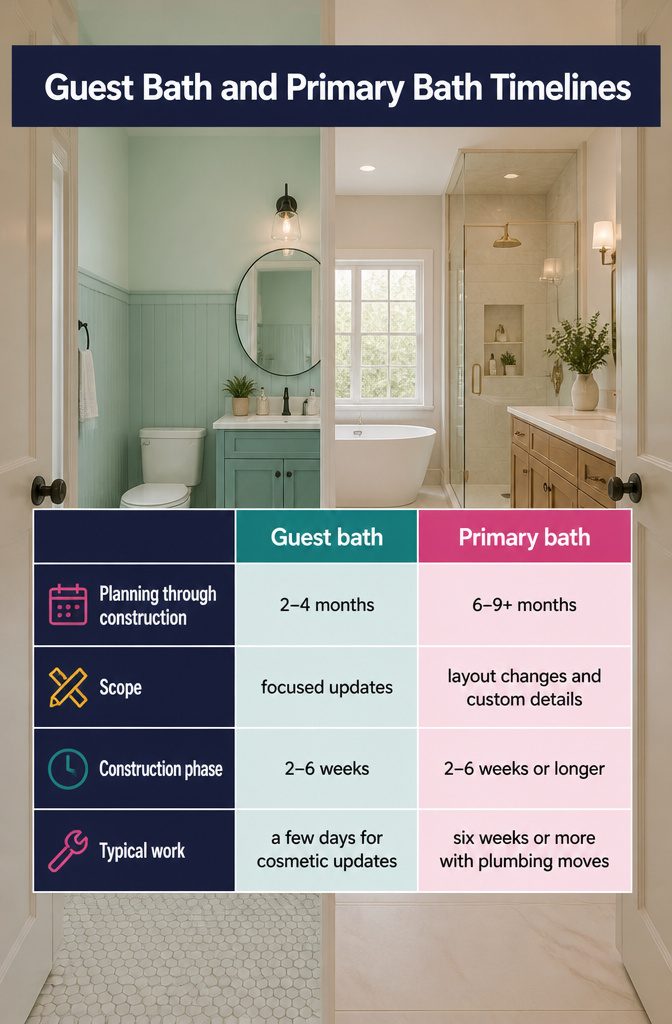
A small guest bath with focused updates can take 2–4 months from planning through construction, while a larger primary bath with layout changes and custom details often runs 6–9 months or longer.
Once work starts, expect the construction phase alone to last anywhere from two to six weeks, with straightforward cosmetic updates wrapping in a few days and full remodels involving plumbing moves stretching to six weeks or more.
Scope determines the calendar, but so do permits, inspections, and material lead times. Custom vanities, specialty tile, and shower glass can take weeks to arrive, and ordering them before demolition starts keeps the schedule from stalling mid-job.
Hidden damage found after walls come down, changes to the design once work begins, and permit or inspection backlogs all push completion further out.
In California, where most bathroom remodels require building permits for structural or plumbing changes, expect a 6–12 week timeline that accounts for those steps.
When You Need a Permit
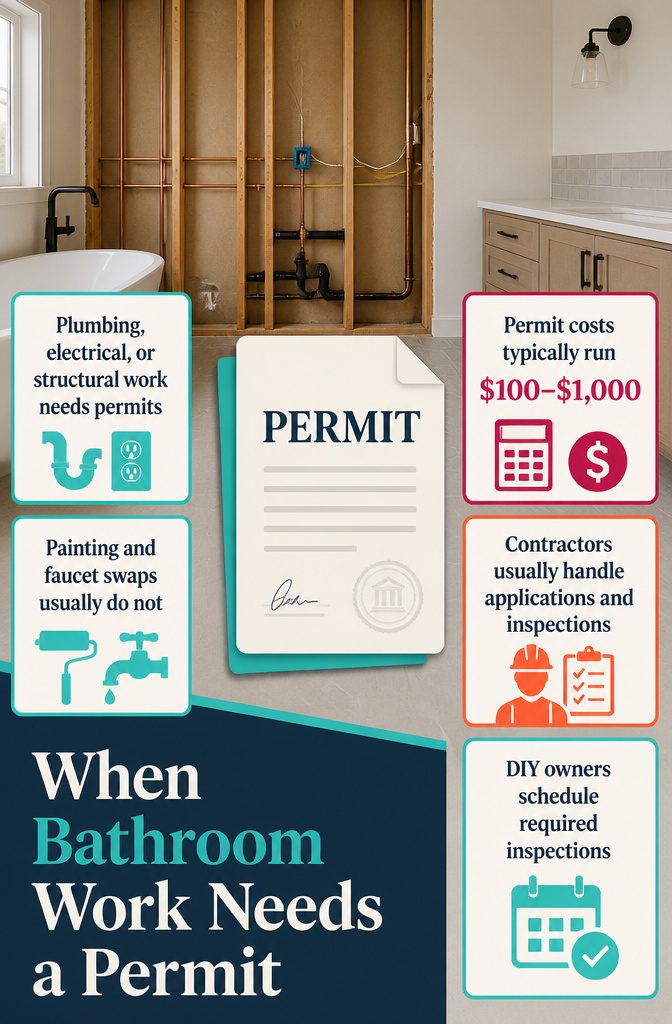
Plumbing, electrical, structural changes, and most other work regulated by your local building department will require a permit.
Cosmetic updates like painting or swapping out a faucet do not. The line is drawn at whether the work affects a system behind the walls or changes the room’s layout.
Permit costs typically run $100 to $1,000, depending on the scope and your municipality. In California, most bathroom remodels require a building permit, so expect one if you are doing more than surface finishes.
Check with your local building department early, because what requires a permit in one city may not in the next, and delays waiting on approval can push the whole schedule back.
If you hire a contractor, they usually handle the application and inspections.
If you are doing the work yourself, the permit is on you, and so is scheduling any required inspections before you close up walls or move on to finish work.
Budget Planning and Where to Save
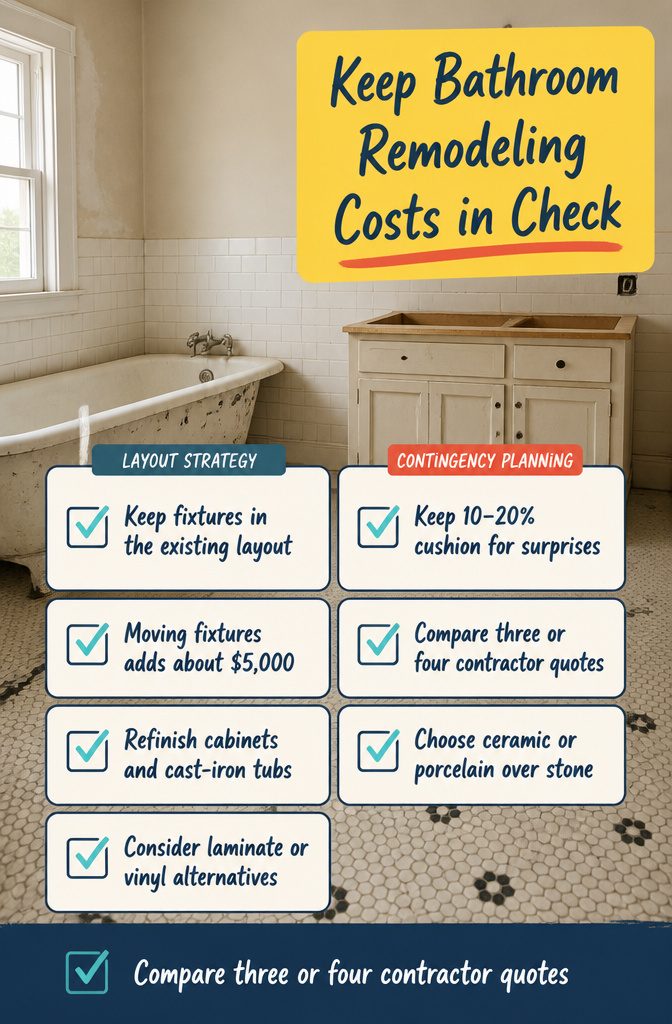
Compare three or four quotes if the work is extensive enough to warrant it, and allow 10–20% cushion for surprises — plumbing behind walls often looks worse once exposed, and subfloor damage from old leaks shows up only after demo.
A few moves keep the budget usable:
- Keep the existing layout. Moving a toilet or shower means rerouting plumbing and electrical, which adds about $5,000. Leave fixtures where they are and spend the savings on better tile or a nicer vanity.
- Refinish instead of replace. Paint existing cabinets, add new hardware, and save hundreds over a new vanity. The same goes for a cast-iron tub — refinishing costs far less than hauling it out and buying new.
- Choose materials that look right without the premium. Ceramic or porcelain tile instead of natural stone, laminate countertops instead of quartz. Vinyl and laminate flooring now mimic hardwood and stone at a fraction of the cost.
What Can Delay the Project
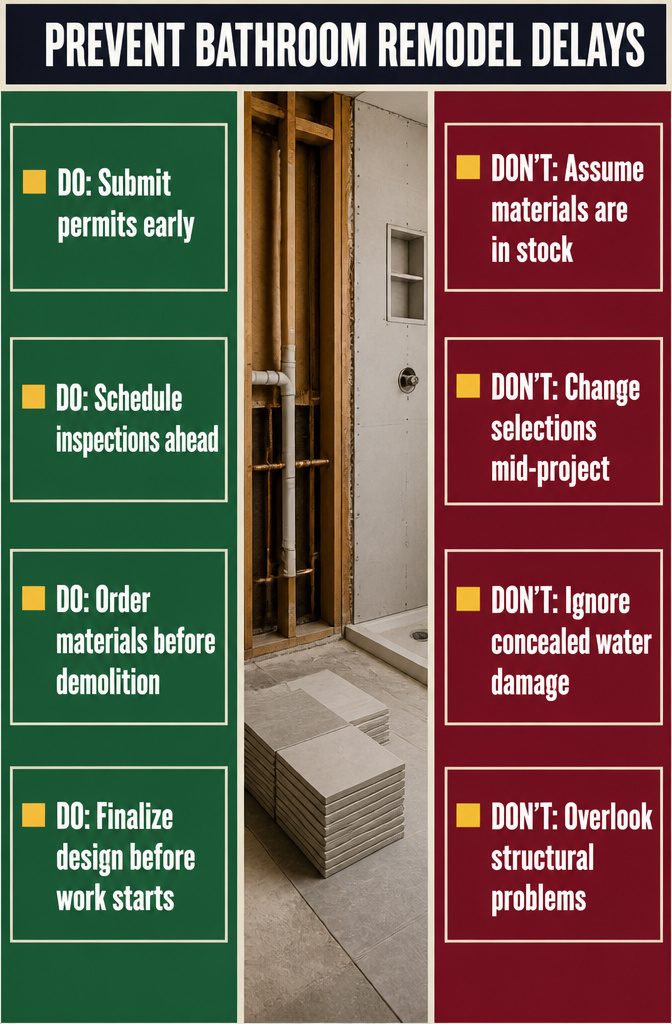
Delays can add weeks to even well-planned remodels. Permit reviews, backordered materials, inspection scheduling, design changes after demolition starts, and surprise conditions behind the walls account for most setbacks.
- Permit and inspection delays. City reviews take time, and inspection appointments fill up fast in busy seasons. Submit permits early and schedule inspections before you need them.
- Material lead times. Custom vanities, specialty tile, plumbing fixtures, and shower glass can take weeks or months to arrive. Order everything before demolition begins, and confirm availability rather than assuming stock.
- Design changes mid-project. Changing selections after work starts means waiting for new materials and re-scheduling trades. Finalize the design before the first wall comes down.
- Water damage and structural repairs. Nearly 1 in 4 homeowners find unexpected water damage during demolition, and about 22% uncover structural issues. Opening the walls can reveal leaking pipes, condensation damage, bad drainage, outdated wiring, or aging plumbing that must be fixed before construction continues.
Frequently Asked Questions
How much does a full bathroom remodel cost?
A full bathroom remodel costs $3,000 to $30,000 for most projects, with an average around $12,115.
Luxury work can top $80,000. Scope drives cost harder than size: a cosmetic refresh runs $25,000 to $95,000, a full replace within the existing layout costs $45,000 to $158,000, and a reimagined layout starts at $115,000 and can exceed $205,000.
How long does a bathroom remodel take?
Most bathroom remodels take 2 to 4 months from planning through construction for a small guest bath with focused updates, while larger primary baths with layout changes often run 6 to 9 months or longer.
The construction phase alone lasts 2 to 6 weeks depending on scope. Permits, inspections, material lead times, and hidden damage all extend the timeline.
Do I need a permit for a bathroom remodel?
You need a permit when the work touches plumbing, electrical, structural changes, or other systems regulated by your local building department.
Cosmetic updates like painting or swapping a faucet do not require one. Permit costs typically run $100 to $1,000 depending on scope and location.
What can delay a bathroom remodel?
Permit reviews, backordered materials, inspection scheduling, design changes after demolition starts, and surprise conditions behind the walls account for most delays.
Water damage, outdated wiring, or aging plumbing often require additional work before construction can continue. Custom vanities, specialty tile, and shower glass can take weeks or months to arrive.
Can a bathroom remodel be completed in one week?
A cosmetic update involving paint, hardware, lighting, and simple fixture replacements may wrap in a few days.
A full remodel involving plumbing moves, new tile, flooring, cabinetry, or electrical work is unlikely to be completed properly in 1 week. Construction alone typically runs 2 to 6 weeks.
How can I reduce the cost of my bathroom remodel?
Keep the existing layout, since moving a toilet or shower adds about $5,000 in plumbing and electrical work.
Refinish existing cabinets instead of replacing them, choose ceramic or porcelain tile over natural stone, and use laminate countertops instead of quartz. Vinyl and laminate flooring mimic hardwood and stone at a fraction of the cost.